Master Data Widget
The Machine Master Data widget allows the user to view the machine vital information such as status and distance tracking during a selected time period
It is stored as a default widget in the Model Dashboard, see Machine Master Data Panel section below.
Configuration
Configure the widget and store it on the Model Dashboard by following the steps below
For the Organization Dashboard, you have the widgets Machine Map and Machine List that show similar information.
It is highly recommended to adapt a Machine Page (Model Dashboard) centrally via the Machine Page Layout. If you need to configure the Machine Page for the selected machine only, proceed as follows:
-
In the selected Machine Page, select Manage Layout > Add widgets.
-
Select the desired widget. A preview will be shown.
-
Click Apply. This forwards you to the widget configuration dialog with the options described below.
If you need to adapt the Organization Dashboard, select the desired dashboard configuration and click Edit > Add  to open the widgets catalog, see also Add Widgets to the Organization Dashboard.
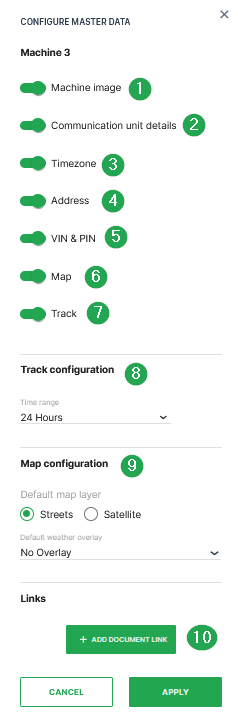
| # | Item | Description |
|---|---|---|
| 1 | Machine Image | Display the image of the machine. Upload an image by following the instructions here. |
| 2 | Communication unit details | Display the communication unit details and usage. |
| 3 | Timezone | Display the timezone of the machine's last known location. |
| 4 | Address | The machine's last known location and displays the time of the most recent location update. |
| 5 | VIN & PIN | Vehicle Identification Number and Part Identification Number. |
| 6 | Map | Display the location of the machine on a map. |
| 7 | Track | Enables a view of the paths travelled to and from different locations during the time period set in the Track Configuration. |
| 8 | Track configuration* | Select the relative time range from now for the track. |
| 9 | Map Configuration | Note that weather and map overlay features are only available with the Feature Switch |
| For examples, see Maps Overlay | ||
| * Default map layer: Streets or Satellite | ||
| * Default weather overlay: No Overlay, Clouds, Precipitation, Air Pressure, Wind Speed, Temperature. | ||
| 10 | Add Document Link | Here, links to URLs or documents can be added. |
*Only active when Track is selected.
Machine Master Data Panel
The Master Data widget will display the information in form of a panel on the dashboard within the following two tabs Machine Details and Location - provided that options are activated in the Master Data Configuration.
Machine Details
Shows the machine info and other details via icons for Maintenance Tasks, Machine Tracking and Weather Forecasts and Overlay when enabled in the Feature Switch. In the Details tab, the following information is displayed additionally to the configured ones:
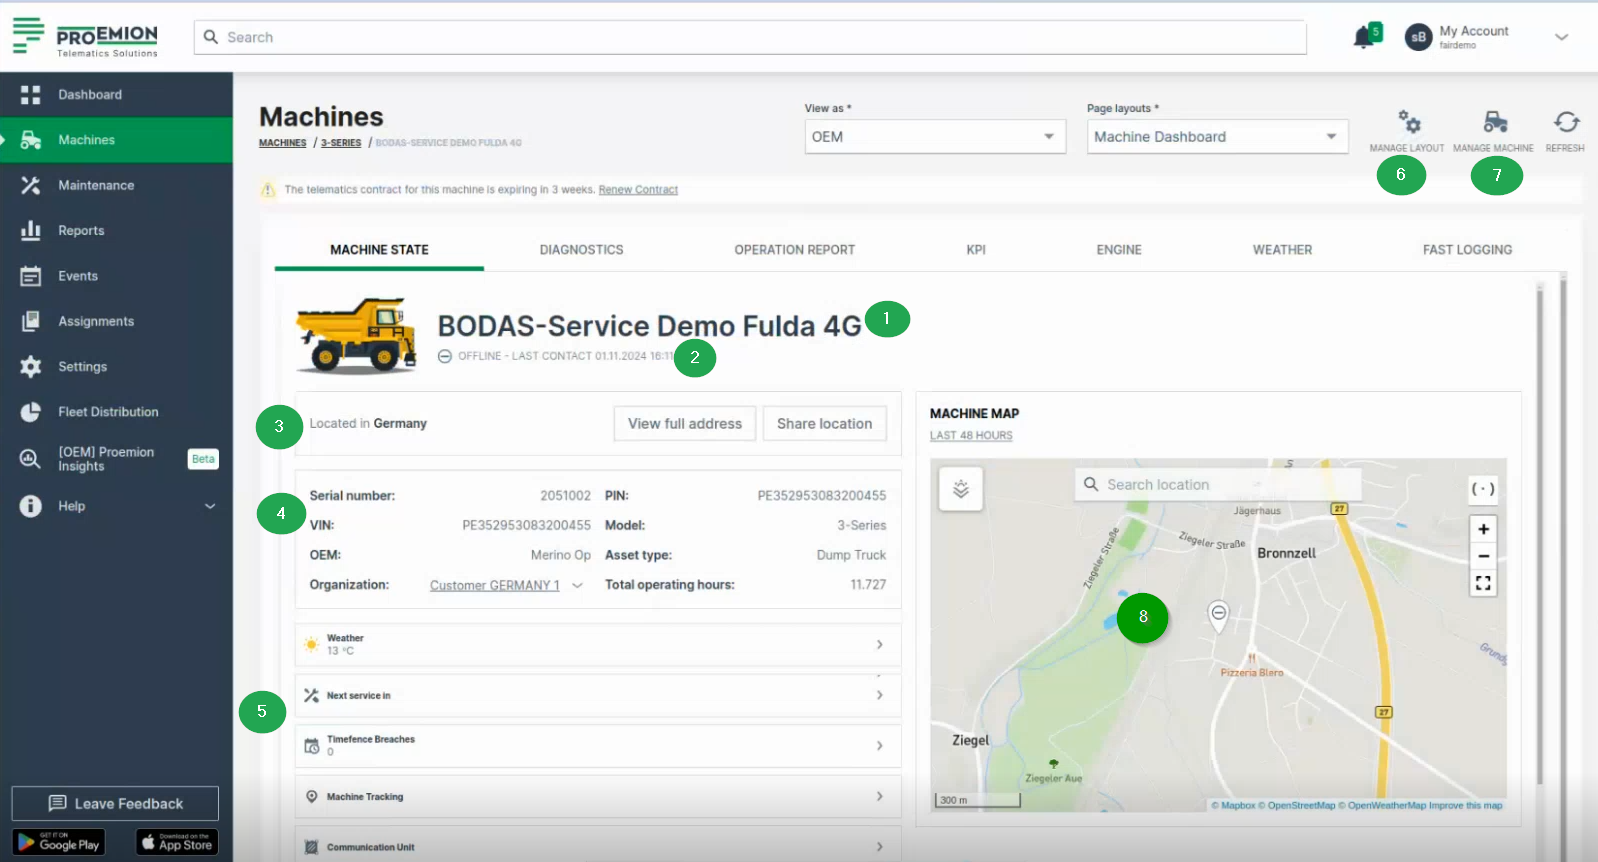
| # | Item | Description |
|---|---|---|
| 1 | Machine Name | Name of the machine. |
| 2 | Connection Status | Current state (online/offline) since a particular date. |
| 3 | Location | Share the location of the machine, see Location. |
| 4 | Machine Info | Serial number - Serial number of the machine. Organization - The organization that created the machine and shares details. Machine Model - See Machine Model. OEM - The Organization the machine belongs to. Asset Type - See Asset Types. |
| 5 | Tabs | 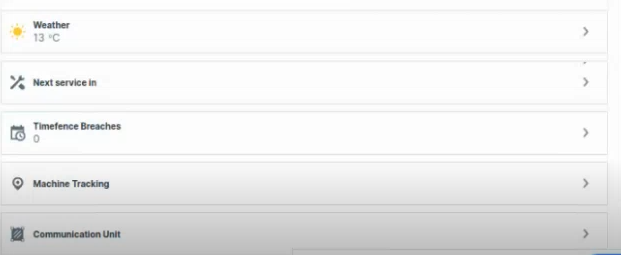 |
| 6 | Manage Layout | Configure the layout of the Machine Details Page, see Manage Layout |
| 7 | Manage Machine | Configure the machine's properties, see Manage Machine. |
| 8 | Map | Displays the machine's location on a map. If the machine is offline, a drop icon with a minus sign indicates its last known position. 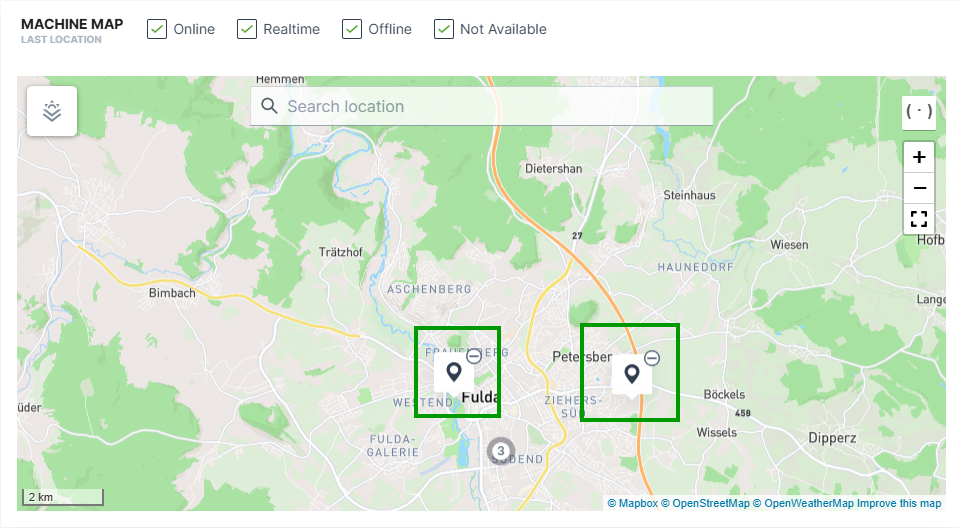 If the machine is online, the endpoint of the current track (circle with the number 3) is displayed . When zooming in, both the starting point (circle with letter A) and the current location (circle with number 2) of the machine are displayed. 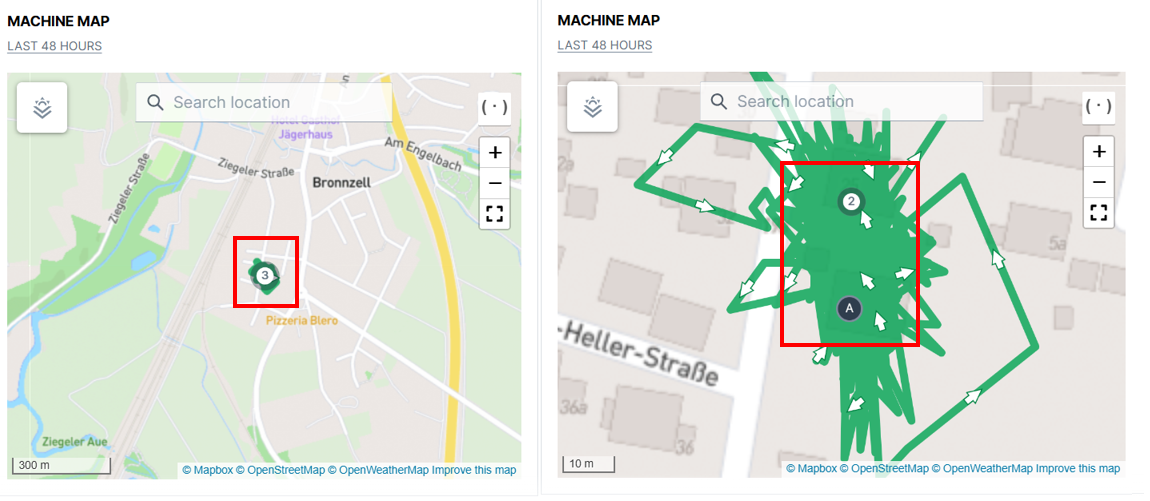 |
Location
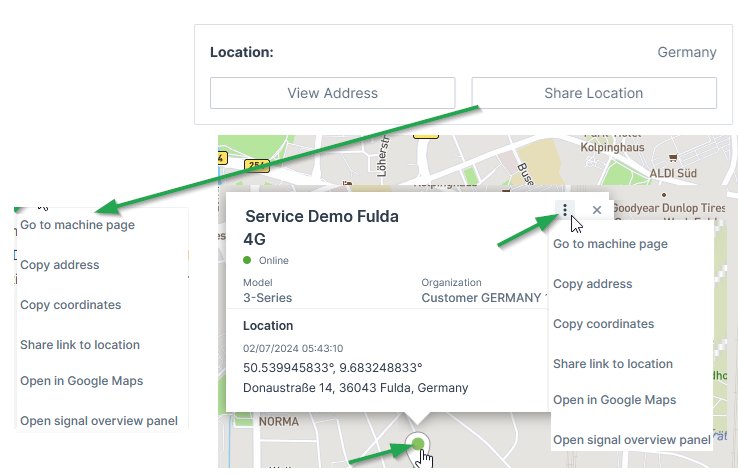
The Location tab gives information about the machine's address and its Status and Update. Via the 3-dots you have options to copy and share the machine's location, see also Machines Overview.
Only if tracking is activated in Machine Master Data, location tracking is visible for the time range displayed above the map.
Note
Location data access must be set by an organization admin and is necessary to use this feature.
Contract Renewal
Contracts that are expiring soon are highlighted in the Machine Page within a banner on the top.
Depending on the user, the information in the banner changes:
-
As a user without at least Contract:Maintain permissions e.g. as a Machine Owner, you may only Request Renewal:
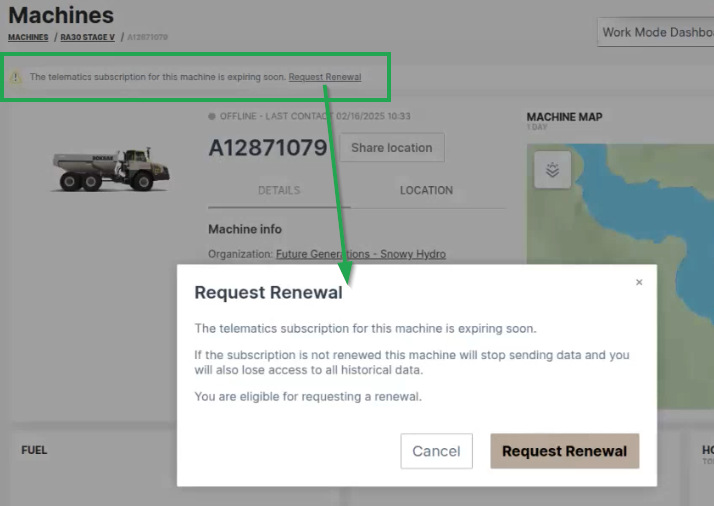
Figure 4: Contract Renewal banner Note
This request will be displayed both on the OEM portal and in the digest email listing the soon expiring contracts.
The eligible user may then renew the contract with Proemion. see below. -
As an eligible user e.g. as the OEM, you are displayed the message that a renewal was requested:
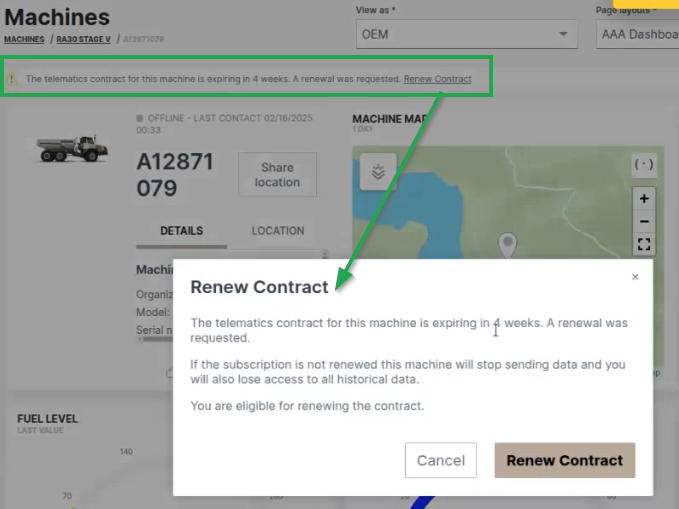
Figure 5: Contract Renewal requested -
Clicking Renew Contract, you will be forwarded to the Machine Contracts menu, where you can configure and confirm the Renew process for the selected machine:
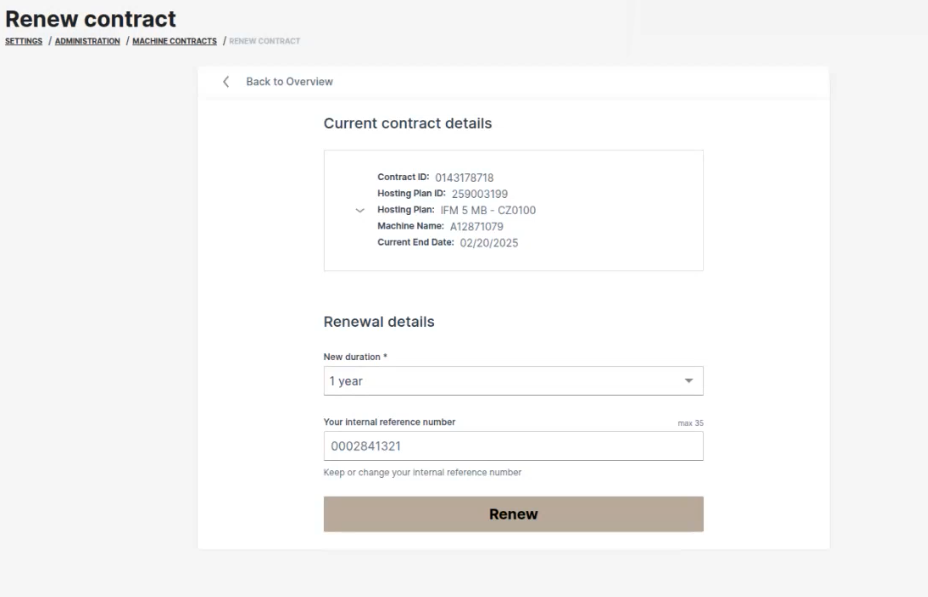
Figure 6: Renew Contracts Note
To renew an "active (canceled)" or terminated contract, you need Contract:Maintain permissions.
-
After successful renewal, a confirmation will be displayed in the Machine Contracts menu:
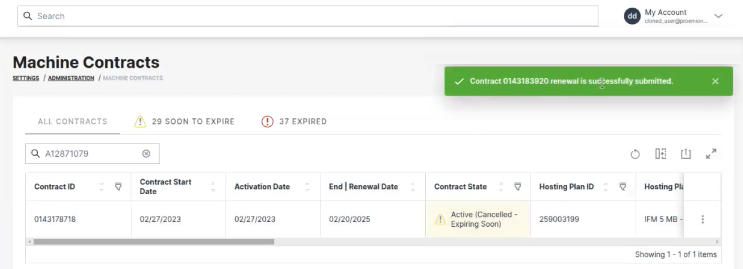
Figure 7: Renew Contracts confirmed
-
After clicking the link in the banner, it will disappear from the machine.
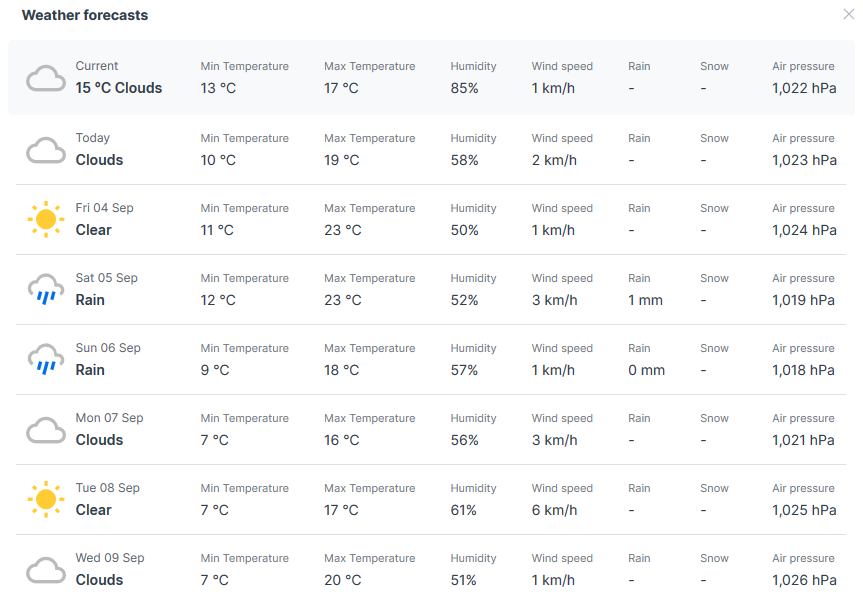
Weather Forecasts and Overlay
The Machine Master Data Panel displays the weather forecast and historical data for the machine geolocation.

Prerequisites
Weather Forecasts and Overlay is a specialized feature available in the DataPortal as part of Feature Switches
It should be noted that implementing this functionality requires additional Proemion resources including project setup, manual configuration, recurring services and costs.
Note
Contact Support or an FAE to discuss implementing Weather Forecasts and Overlay for your organization.
Note
Only users with the Organization: Admin permission set can manage weather forecasts and overlays.
Note
Location data access must be set by an organization admin and is necessary to use this feature.
Weather Overview
Available data is shown in the table:
| Weather Item | Unit |
|---|---|
| Temperature | Degrees in °C |
| Wind speed | Meters per second (m/s) |
| Humidity | Percentage (%) |
| Air Pressure | Hectopascal Pressure Unit (hPa) |
| Weather types | clear |
| rain | |
| snow | |
| clouds | |
| thunderstorms |
You can see the temperature in the machine location in the bottom of the information panel to the right.
Note
Maps Overlay data (see the scale) is provided in metric units, while Forecast data reflects the standard selected in User Settings.
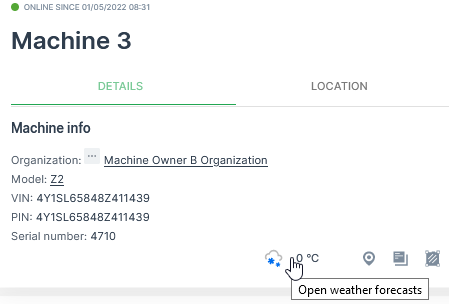
Open the forecast for the surrounding area by selecting the temperature:
Maps Overlay
Note
This functionality is available via Feature Switch.
The Maps Overlay covers both the Map overlay and the Weather overlay options.
Map Overlay changes the view on the map:
-
Streets is the map view (default view).
-
Satellite shows true colour aerial image.
Weather overlay additionally shows different aspects of the weather on the map.
The options can be combined as in the following examples:
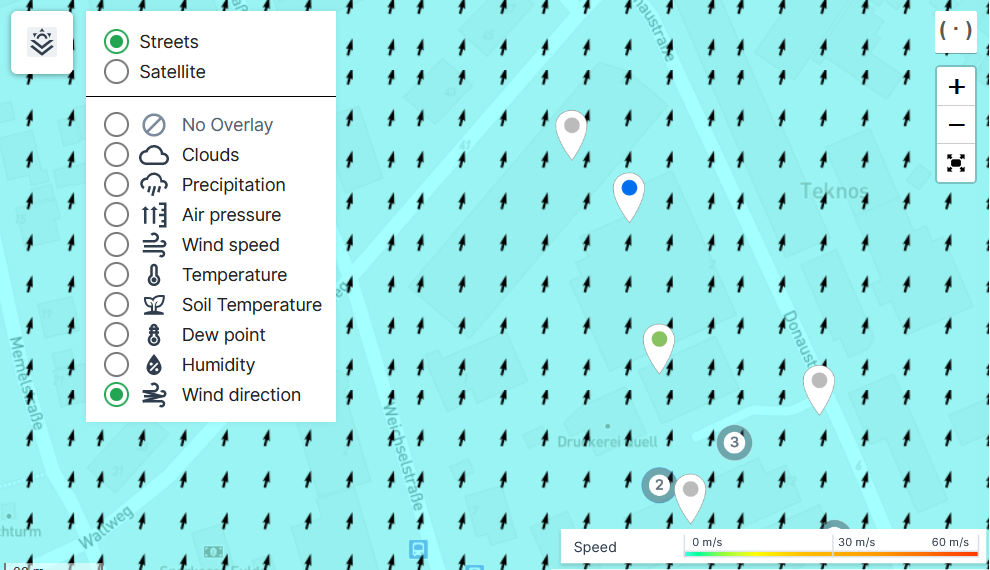
In the map, select the Overlay  icon to open the Maps Overlay menu. There, select one or more overlay options.
In the following example, we have selected the default Streets overlay and Wind direction overlay that shows the wind speed scale in the bottom right corner of the map:
In the following example, in the same map, we have now selected the Satellite and Temperature overlay that also shows the temperature scale in the bottom right corner of the map:

Communication Unit Firmware Details and History
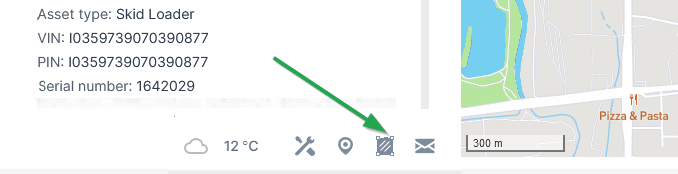
The Machine Master Data Panel displays information about the Communication Unit firmware and configuration via Communication Unit Details.
Click the Open communication unit details icon in the bottom-right corner to view Communication Unit Details.
For detailed information refer to Communication Unit Details.
Status and Update
Note
To display the latest address of the selected machine, please select the LOCATION tab first.
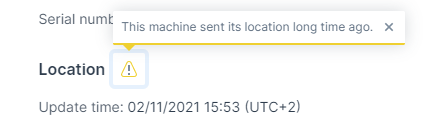
The Machine Master Data Panel displays the most recent location status update. However, this information may not always reflect the realtime status of the machine and so there are safeguards in place that indicate potentially misleading state data
The most recent location time exceeding 8 hours is flagged with a warning (yellow indicator).
Note
Location data access must be set by an organization admin and is necessary to view map location.
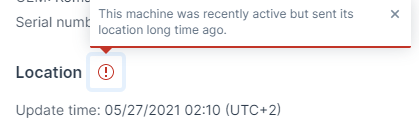
If the latest signal was received > 2 hours later than the most recent location update it is flagged with an alert (red indicator).
Status data (location info, warnings and alerts) is visible on the following DataPortal screens:
-
Organization Dashboard > Map tooltip
-
Machines Overview > Map tooltip
-
Machine Page > Location tab