Models Management
The DataPortal enables the management of machine models so that Admins, can categorize the machines in their organization.
The Models page is only visible to organizations that are tenants, typically the OEM.
For more information, see Tenant.
A model represents the type and class of a machine such as Digger 950L or Digger 1070XL. The machine on the DataPortal represents the individual real machine such as Digger 1070XL - S/N 190512
In this section we demonstrate the Model Management dialog.
Read also Model-Based Signals that have an impact on the model's visibility in the DataPortal.
The Models page also contains a link to Asset Types.
Note
Note that only models with assigned PDC, see Create Model - PDC are available for selection in the Provisioning dialog.
Note
The Settings > Administration > Organization Structure > Models tab is deprecated. Models can no longer be placed anywhere in the Organization Tree. Please use the new Model page in Settings > Machine Data Management > Models.
View Models
View the existing models in your organization as follows.
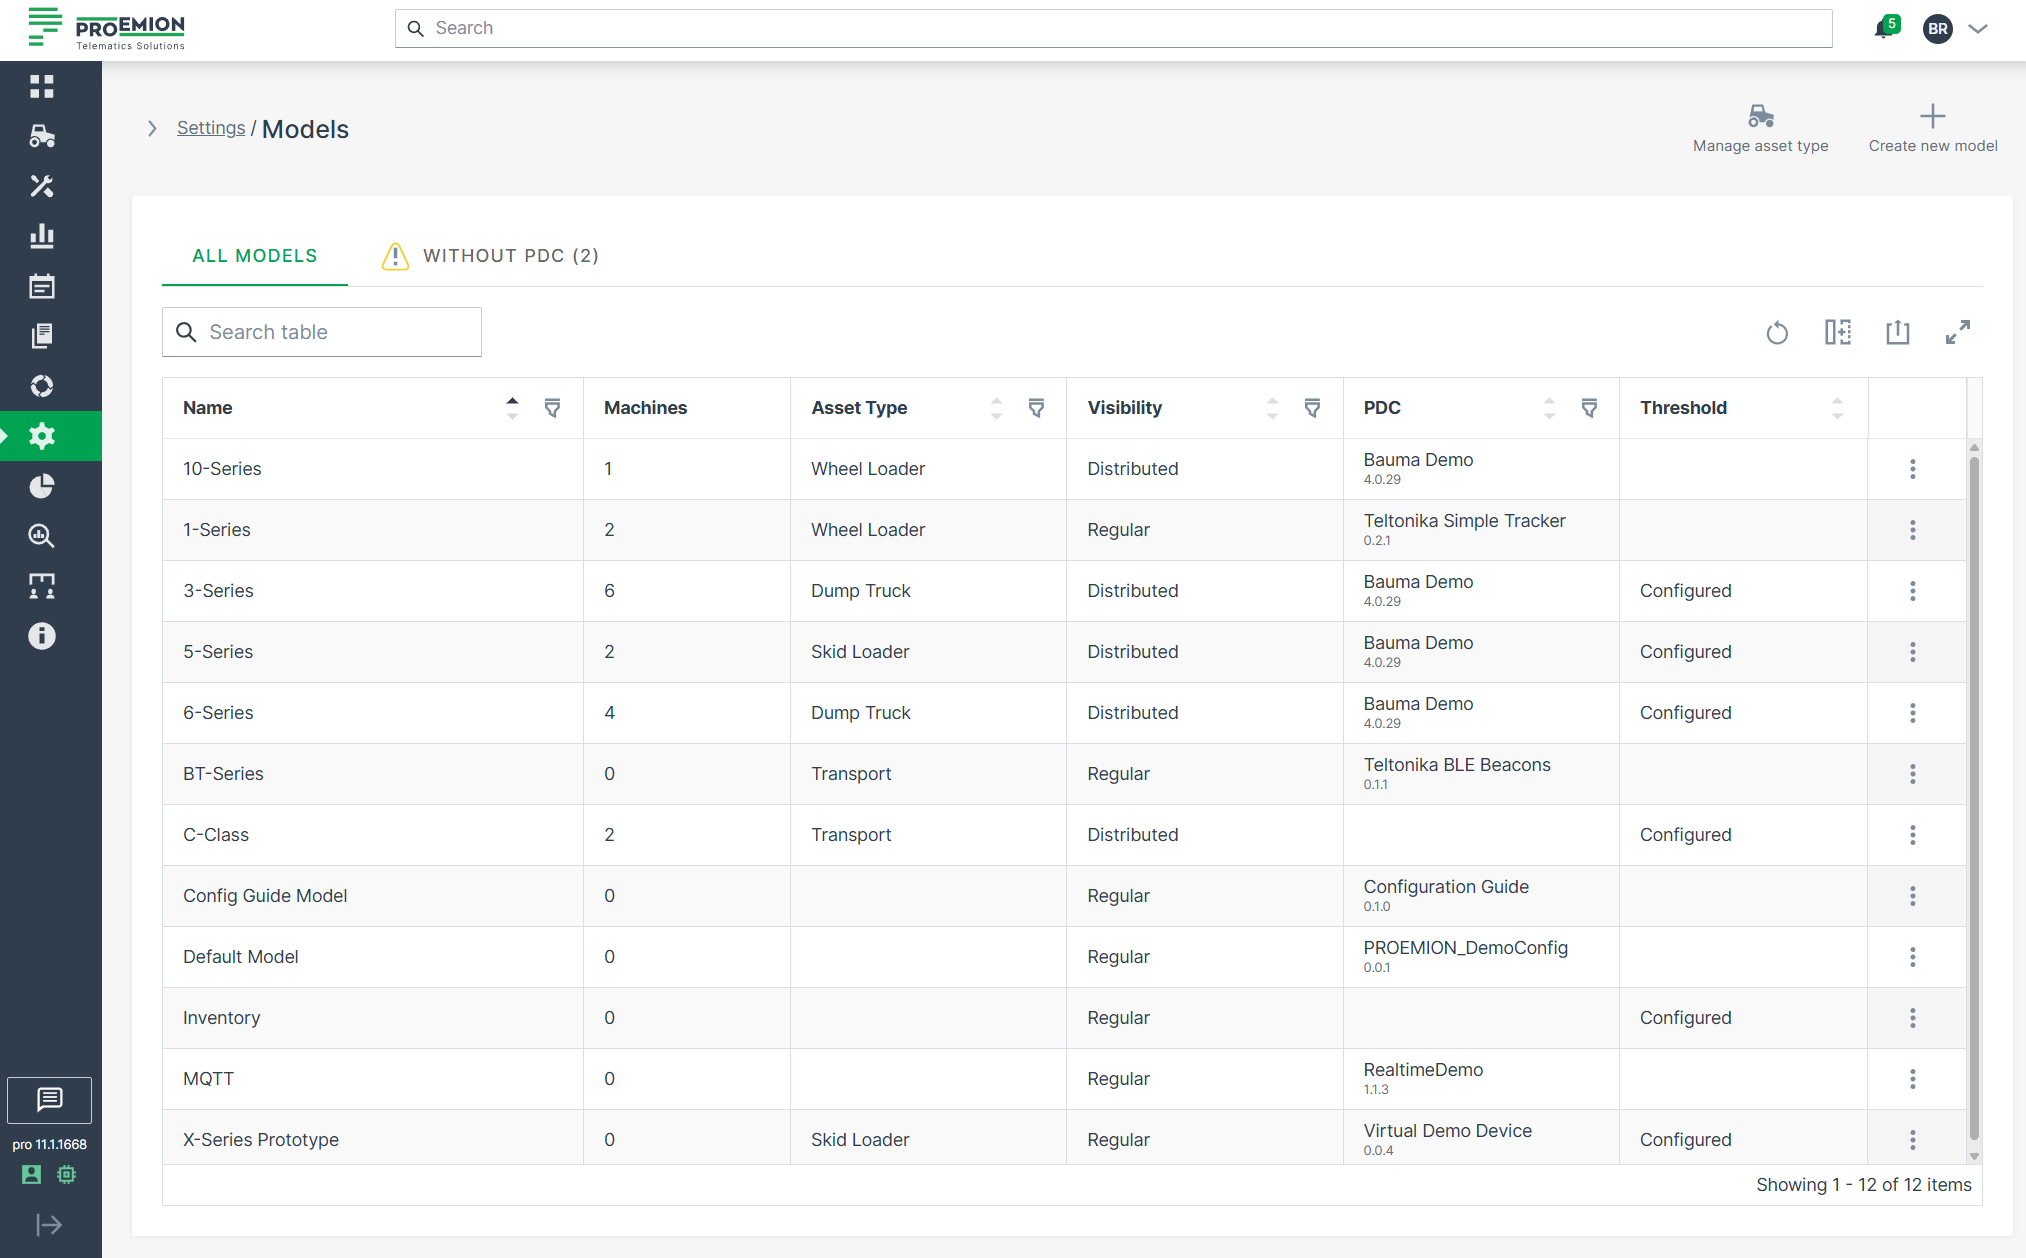
- Open Settings > Machine Data Management > Models.
This opens a list view of the models that are assigned ONLY to this organization in addition to the number of machines assigned to that model.
Create Model
-
Open Settings > Machine Data Management > Models.
-
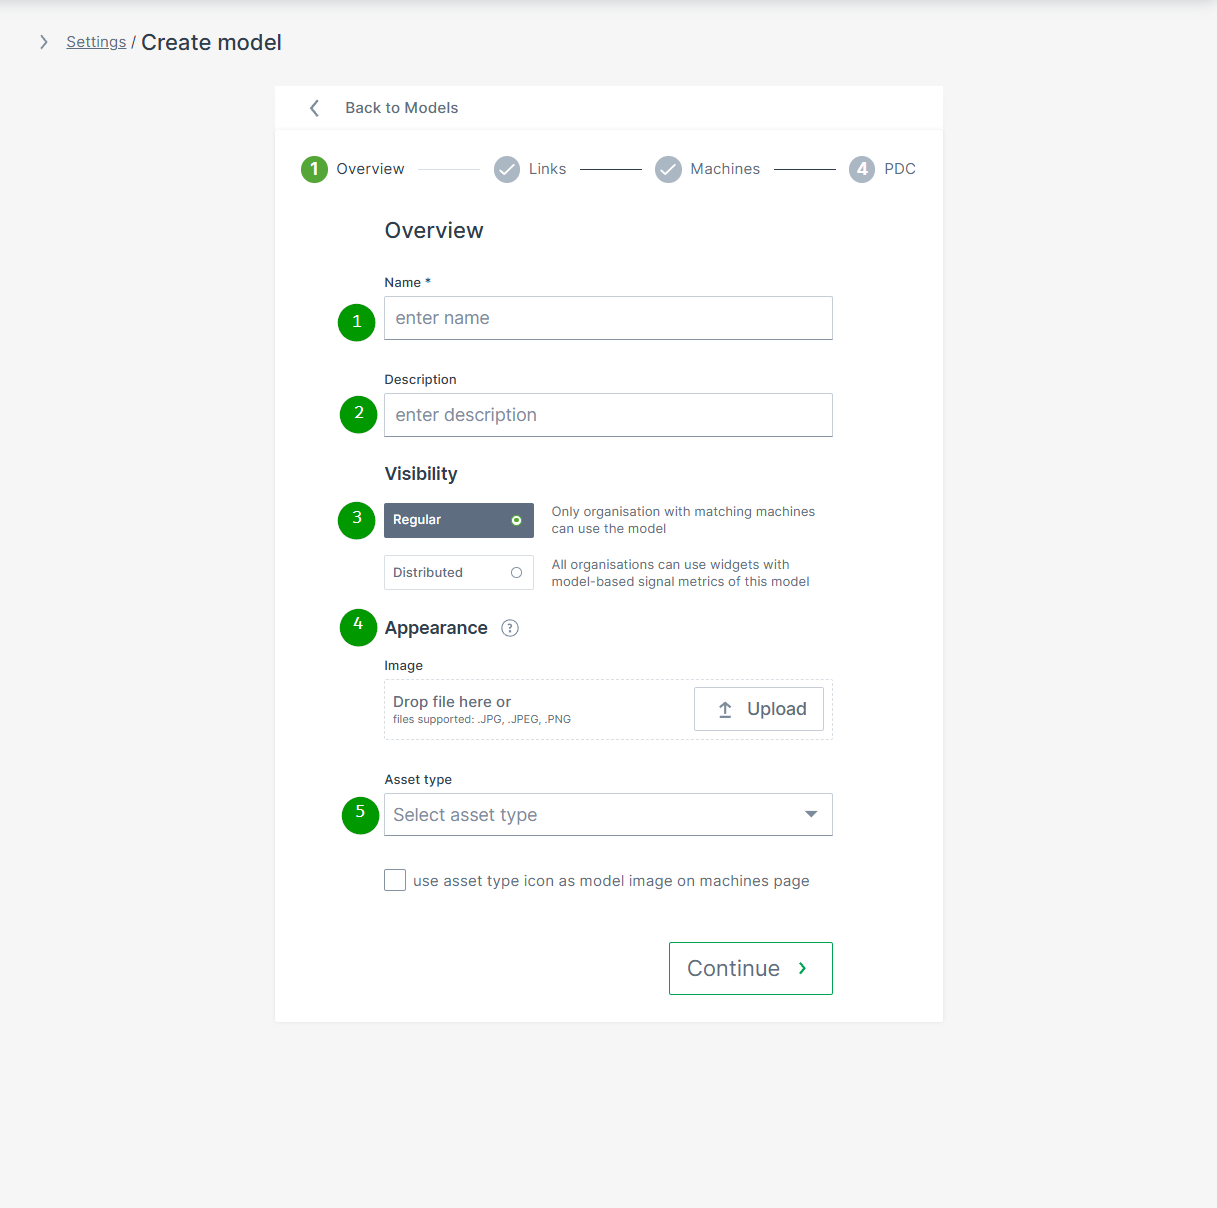
Click the New Machine Model button on the upper right side of the models list to open the Create Model dialog:
| # | Item | Description |
|---|---|---|
| 1 | Name | Model identification. |
| 2 | Description | Definition of the model. |
| 3 | Visibility | Defines the visibility of this model and its Model-Based Signals. |
| 4 | Appearance | The model picture will be shown for any machine assigned to this model. NOTE: In case that an individual image for a specific machine was uploaded, the individual machine image will be displayed instead. |
| 5 | Asset type for map and list view | Select the icon and label defined in Asset Types that will be displayed in the Machines Overview for the machines assigned to this model. You can then decide if the icon should be displayed instead of the uploaded image. |
Click Continue to assign links, machines and PDCs to the created model.
Create Model - Links
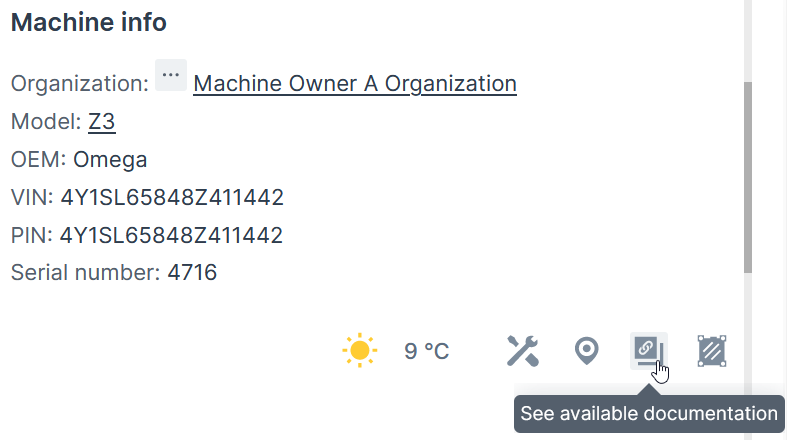
This option allows administrators the assignment of model-related service documentation and other external resources, which will be displayed in the Machine Master Data.
Note
Note that the Documentation Link feature must be enabled in the Feature Switch.
If the feature is not enabled, the Links tab does not appear, as illustrated in the following screenshot.

To add links to models, proceed as follows:
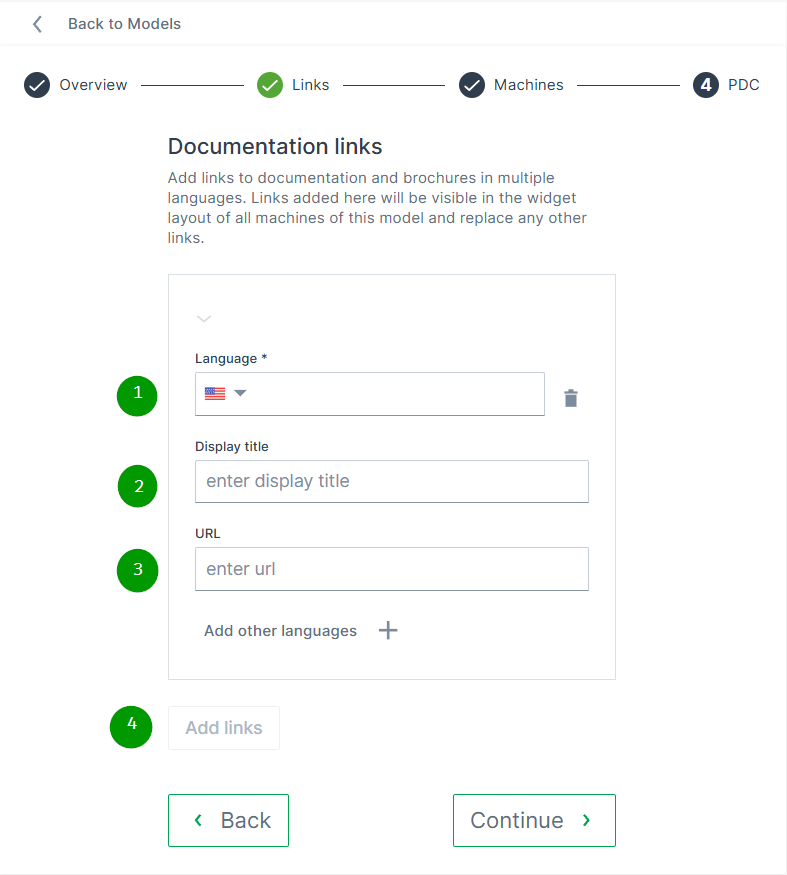
| # | Item | Description |
|---|---|---|
| 1 | Language | Choose the language for the Display title. Add additional languages using the + button. |
| 2 | Display titel | Enter the name that will appear in the Machine Master Data widget (see image above). |
| 3 | URL | Provide the web address of the documentation or other external resources. |
| 4 | Add links | Define additional links. |
Create Model - Machines
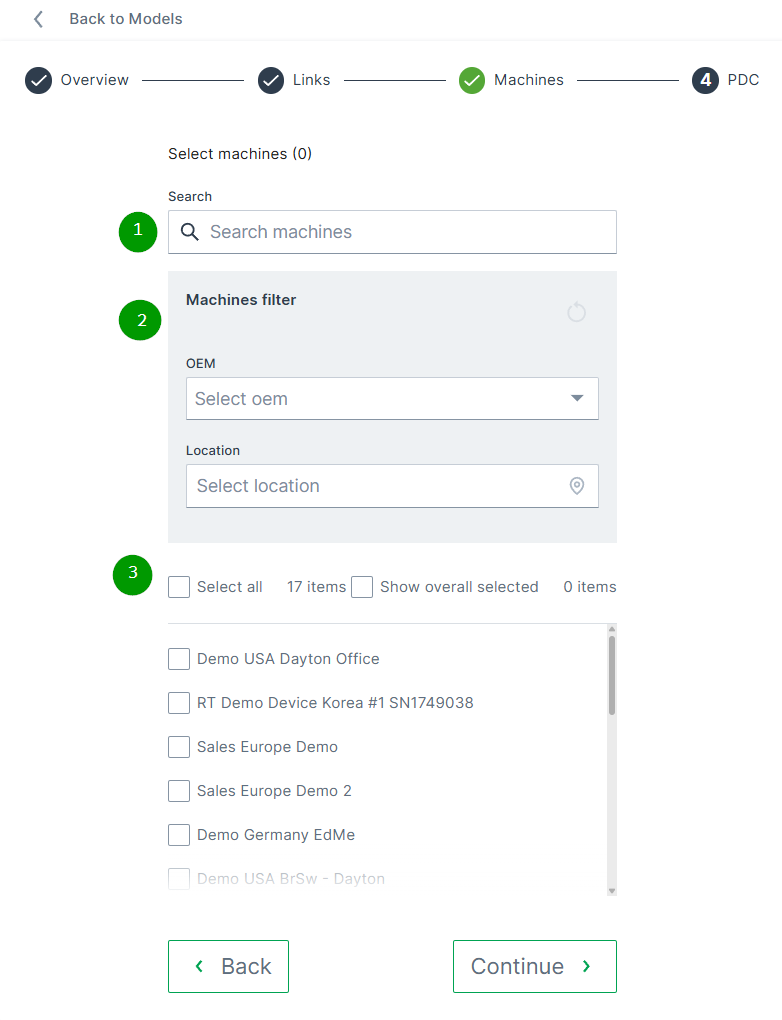
Search and select machine(s) to assign them to the model.
Create Model - PDC
For more information on PDCs, read PDC Management.
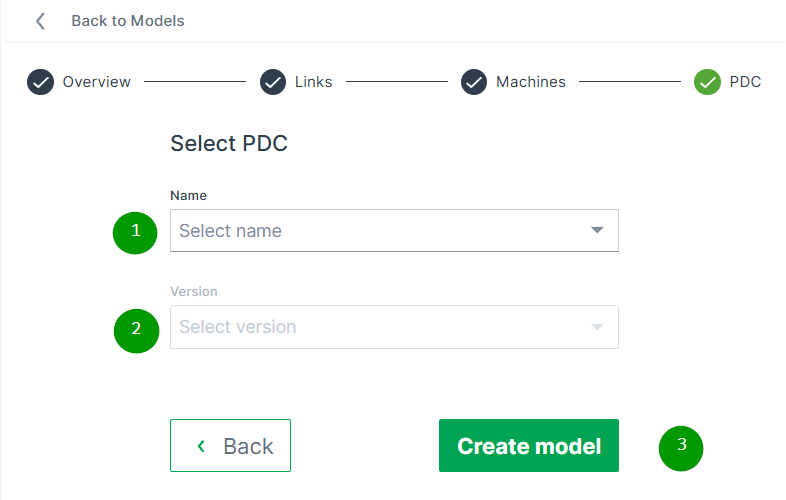
| # | Item | Description |
|---|---|---|
| 1 | Name | Shows the name of the selected PDC file. Open the dropdown menu to select one of the available PDC files. |
| 2 | Version | Select the required version of the uploaded PDC files. |
| 3 | Create model | Button to complete the configuration of the model. |
Edit Models
To Edit an existing model:
-
Open Settings > Machine Data Management > Models.
-
Open the 3-dots menu at the end of the model´s row and select Edit model.
The Edit model dialog opens:
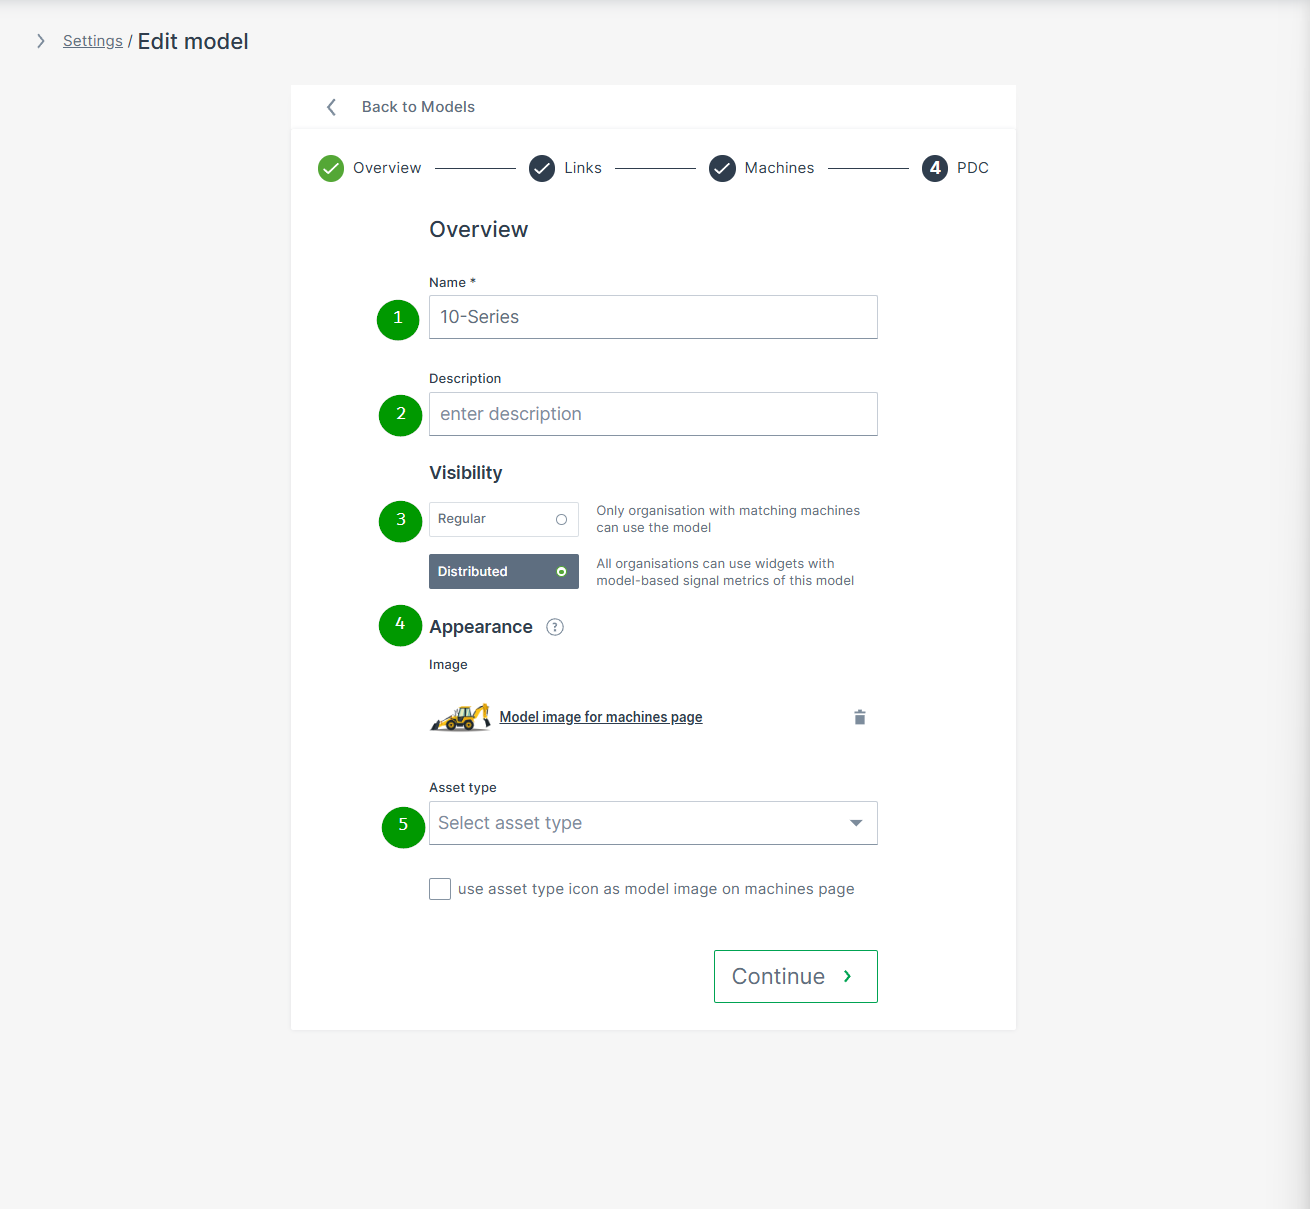
| # | Item | Description |
|---|---|---|
| 1 | Name | Model identification. |
| 2 | Description | Definition of the model. |
| 3 | Visibility | Defines the visibility of this model and its Model-Based Signals. |
| 4 | Appearance | The model picture will be shown for any machine assigned to this model. NOTE: In case that an individual image for a specific machine was uploaded, the individual machine image will be displayed instead. |
| 5 | Asset type for map and list view | Select the icon and label defined in Asset Types that will be displayed in the Machines Overview for the machines assigned to this model. You can then decide if the icon should be displayed instead of the uploaded image. |
Note
The trash icon next to the model is disabled if it has assigned machines.
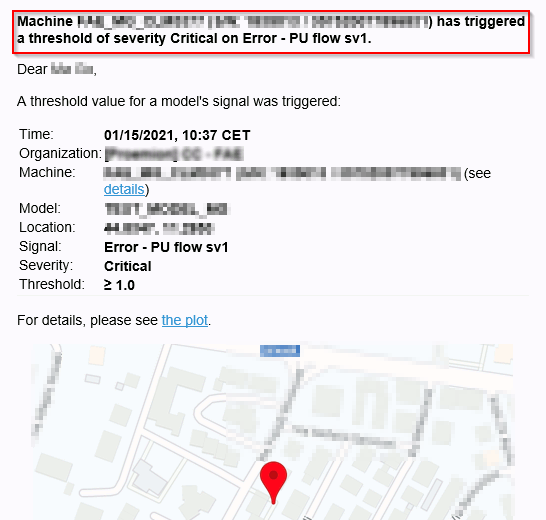
Threshold Configuration
Model-based thresholds enable users to evaluate machine use via signal level thresholds. This feature allows you to apply thresholds to many machines with minimal effort.
The Model:Admin permission set is required to use this feature.
Further details about thresholds severity levels, configuration, notification and reporting can be found in the section Threshold Notification.
Users are also able to view signal threshold history in the following visualizations:
-
Custom DataPortal events
Configuration
Note
Thresholds are only available in the Models tab if the model and the user belong to the same organization. For each machine model, a set of thresholds can be configured per signal.
To configure a threshold for a model, proceed as follows:
-
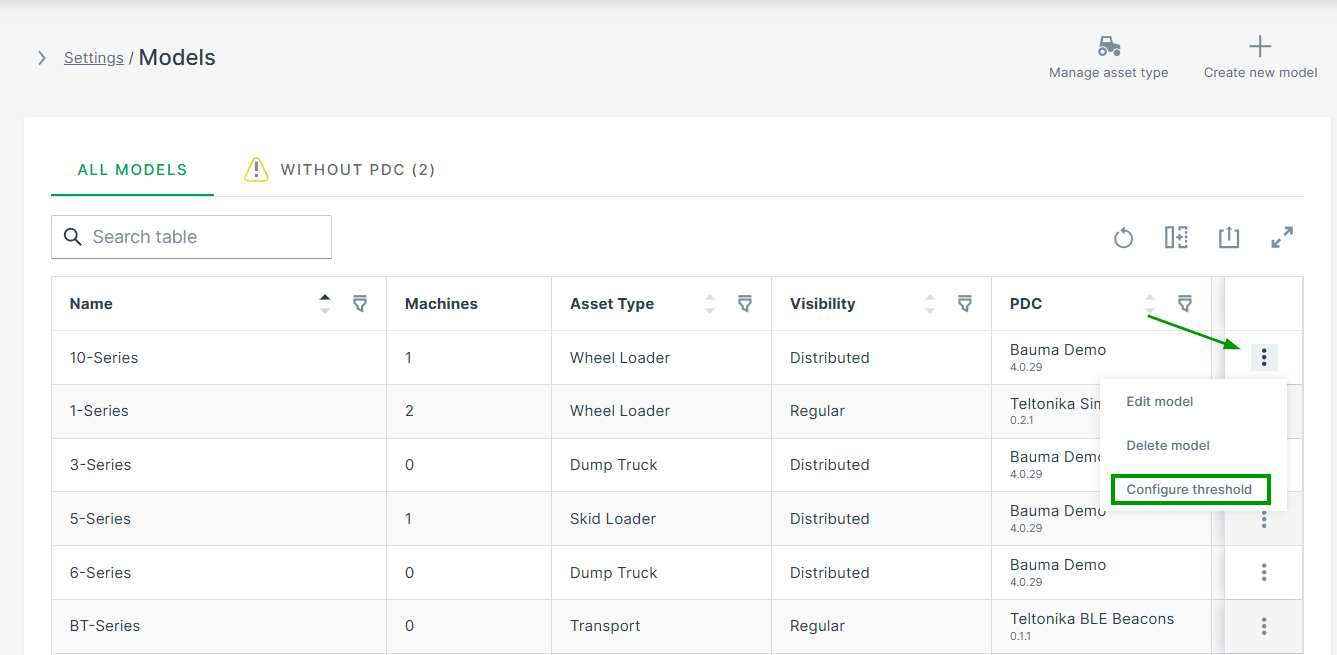
Open Settings > Machine Data Management > Models.
-
Open the 3-dots menu at the end of the model´s row and select Configure Thresholds. The Configure threshold page opens:
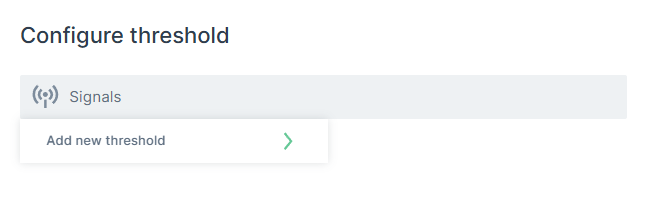
Figure 10: Signals field -
Click in the Signals field and Add new threshold
The list of signals opens.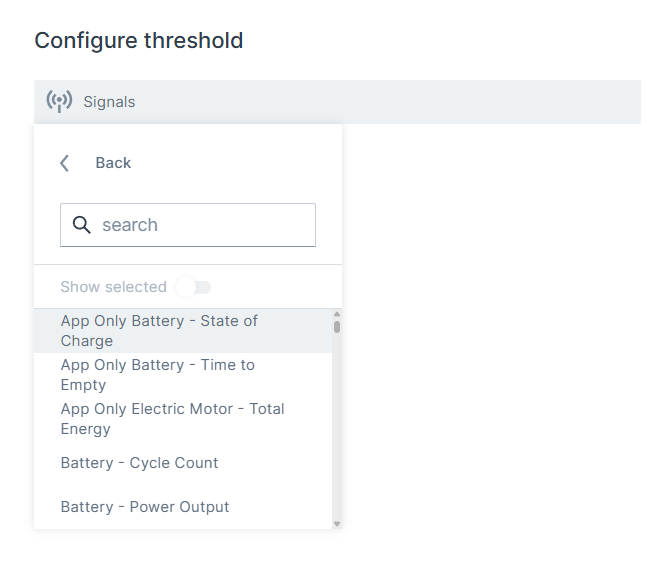
Figure 11: Signals list -
Select the signal from the list and configure its threshold.
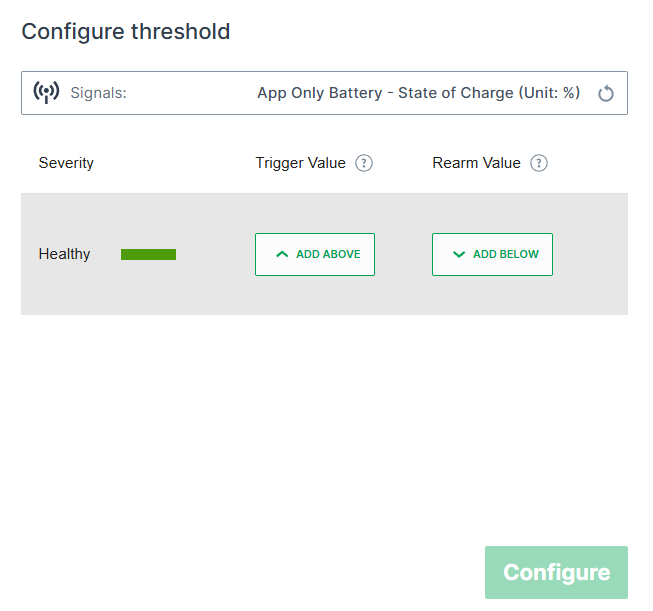
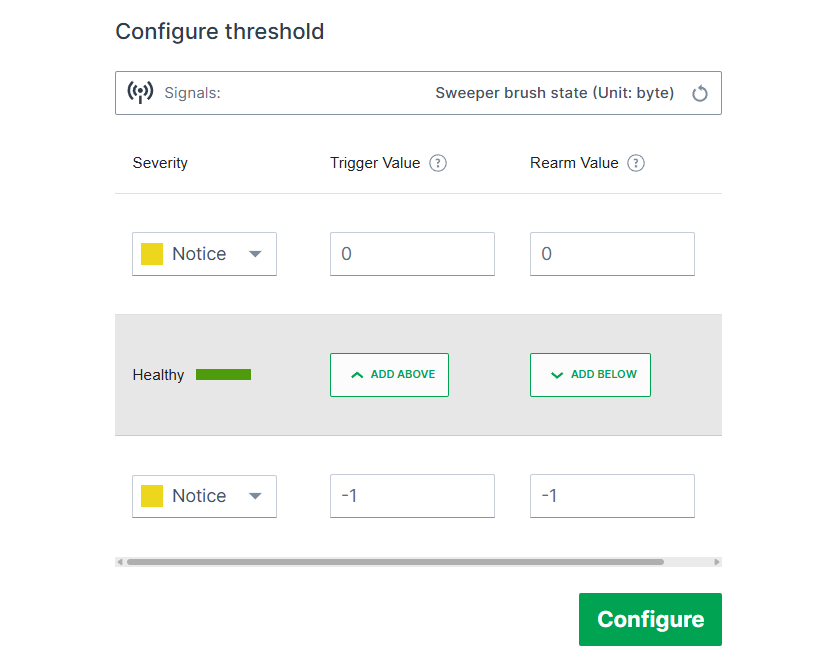
Figure 12: Configure threshold for selected signal
| Item | Description |
|---|---|
| Severity | Select the severity level outside the healthy signal value region. |
| Trigger Value | Set the signal value for a threshold. |
| Rearm Value | Set the value where the notification trigger is rearmed. |
Edit Threshold for a Single Machine
For testing or special circumstances it may be necessary to edit the threshold configuration for a single machine.
Since thresholds are designed for models, the procedure to test thresholds is as follows.
This procedure allows you to configure and view thresholds for a single machine.
-
Create a special test model without assigning it to a machine.
-
Assign the PDC to the test model.
-
Assign the model for testing purposes to a single machine and test the thresholds.
 -->
-->
- Define the thresholds for this model.