Machine Page Layout
The Machine Page Layout is the central place for configuring all Model Dashboards and configuring their layout of widgets.
When activated, the Machine Page Layout menu is to be found in Settings > Portal Appearance > Machine Page Layout.
A Machine Page inherits the layout of widgets from the Model Dashboard. Therefore, in the Machine Page Layout menu you should proceed as follows:
-
Manage Binding: bind the existing layouts to the models.
-
Layout Visibility: manage which organization type can view this layout per model.
-
Create Layout: create a new layout or including widgets for the dashboard, resp. Machine Page. You may also Duplicate Layout to adapt an existing layout and assign it to models.
Consider also the following differences:
-
The Machine Page is the dashboard for machines and is bound to a model and Organization Type. Thus, subsequently added organization units of that type will inherit layouts.
-
The Organization Dashboard is displayed upon entering the DataPortal and is bound to an Organization Unit. Note that there is also the "Dashboard Page Layout" menu to Add Widgets to the Organization Dashboard.
Requirements
-
Activate the Feature Switch for Machine Page by Org Type to enable the Machine Page Layout menu.
-
Activate the following permissions:
-
The permission to edit the layouts is Dashboard:Admin, see Dashboard Subject. This permission can be only granted to users within tenant organization and of Organization Type "OEM".
-
The permission to view the layouts is Machine:View, see Machine permissions; the users can see the layouts available for their models in the Machine Page Layout.
-
-
Organizations must have the Organization Type assigned.
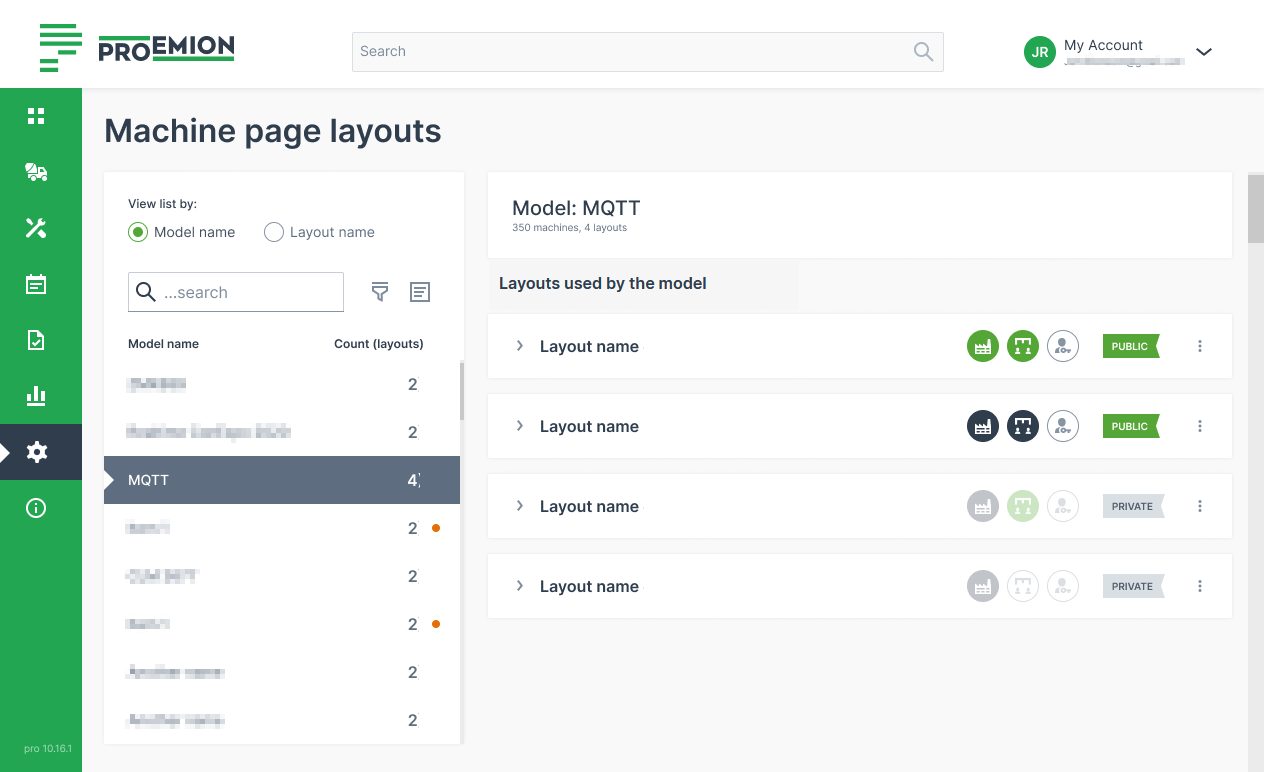
Machine Page Layout Views
The Machine Page Layout menu offers two views:
| View List by Model Name | View List by Layout Name |
|---|---|
 |
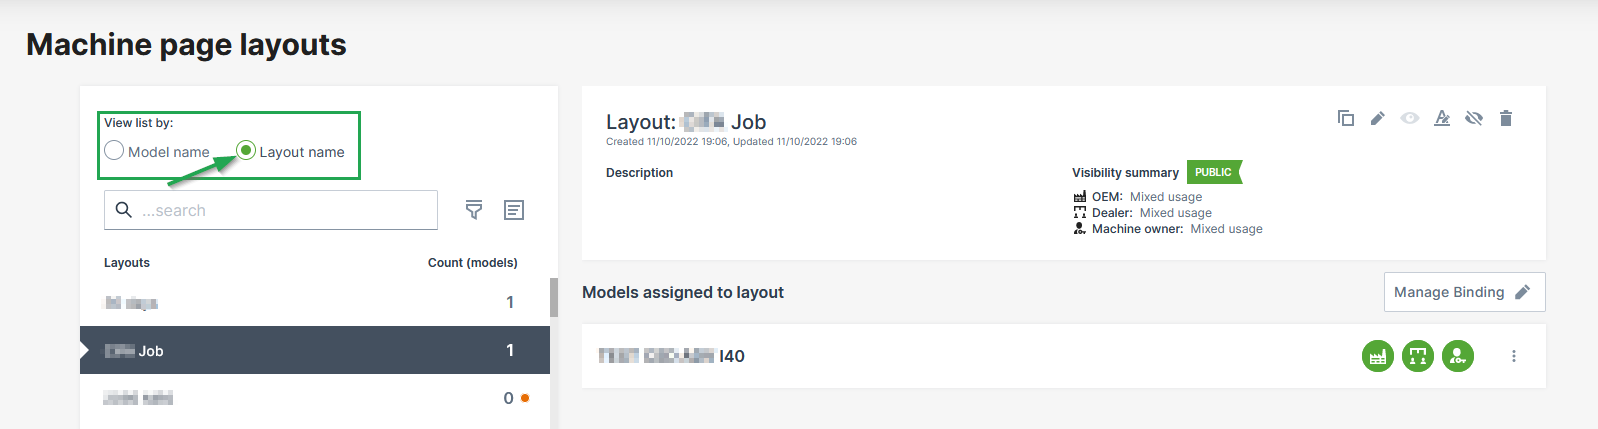 |
| Is selected by default. | You can change to the "List view by the Layout names" via the View list by button. |
| The number of assigned layouts is shown by the end of each line. | The number of assigned models is shown by the end of each line. |
| When selecting a model, the list of "Layouts used by the model" is displayed on the right. | When selecting a layout, the list of "Models assigned to layout" is displayed on the right. |
In case no layout has been assigned to the model yet, the count is 0 and a red dot is shown next to it. |
In case the selected layout hasn't been assigned to a model yet, the count is 0 and a red dot is shown next to it. |
| You can open Manage Binding+ to assign layouts to that model, resp. models to the layout, see Manage Binding. | |
| Different icons show the level of visibility for each organization type. | A Visibility summary shows the assigned visibility level for each organization type. "Mixed usage" is displayed in case a layout is assigned to different models with each different visibility levels for that organization type. |
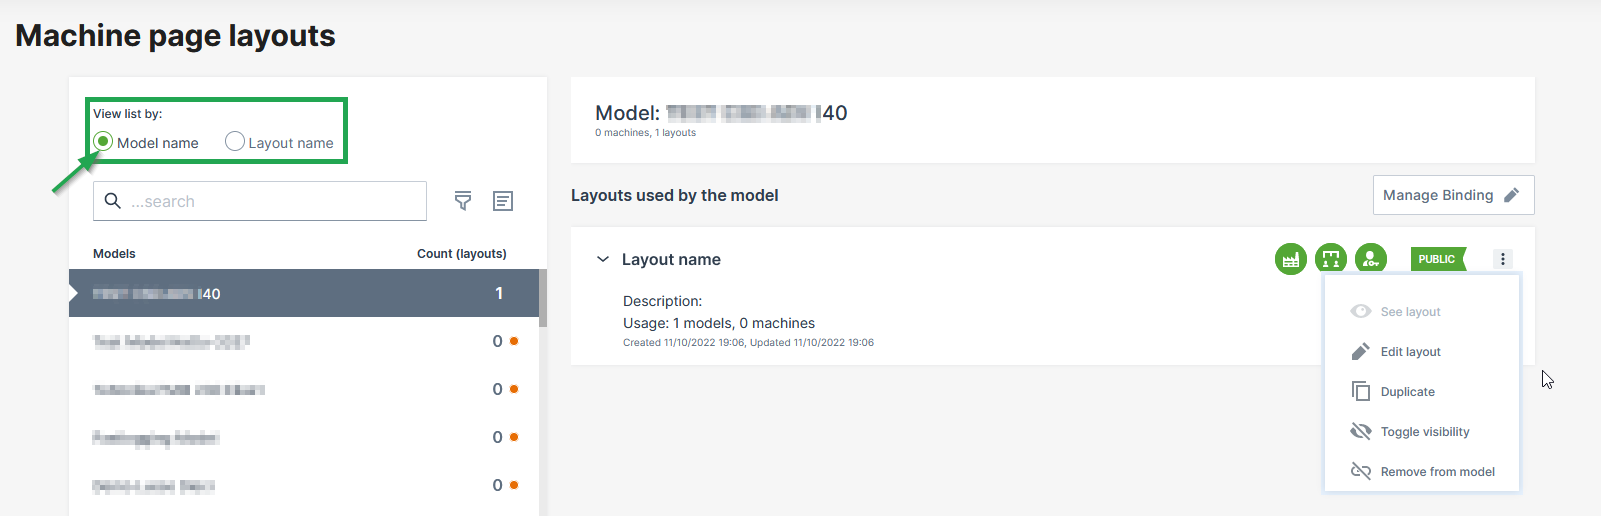
When selecting a layout, the configuration options are displayed via the drop-down menu: 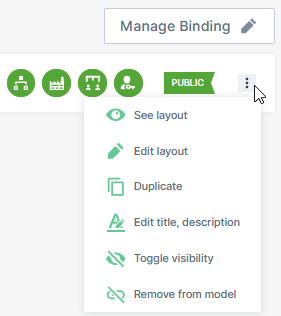 |
When selecting a layout, the configuration options are displayed in the upper right corner:  |
The following configuration options are available in both views.
 Preview Layout View the current layout (or preview while editing before publishing the layout).
  Manage Binding You can assign layouts to other models, resp. assign models to layouts. Add/adapt the title of the widget that will be displayed in the layout.
  Duplicate Layout Use the current layout as a basis for new one.
 Layout Visibility Adapt which organization types and are allowed to view the layout. For each organization type and visibility, different icons are shown.
  Delete Layout Remove the layout for a model. You can also delete a layout completely.
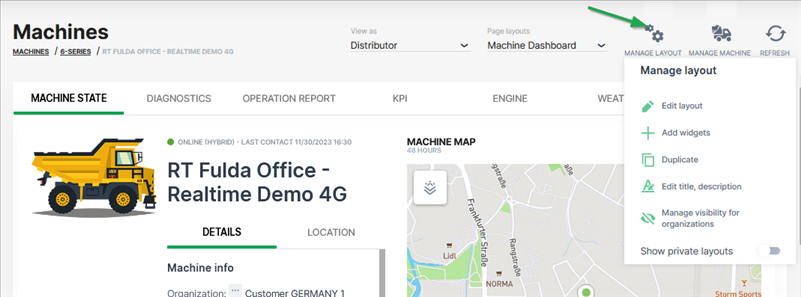
  Machine Page Edit the title and add a description. This option is only available via Machine Page > Manage Layout.
  Machine Page Show the not publicly available layouts for the machine model. This option is only available via Machine Page > Manage Layout.
 - In the Machine Page, the configuration options are to be found in the upper-right corner of the selected Machine Page > Manage Layout:
Manage Binding
To manage the binding, means to assign an existing layout to a model (or models to layouts). You may also Duplicate Layout before assigning it to model in order to adapt the layout for the specific model(s). Consider to adapt the Layout Visibility.
In the Machine Page Layout, select the layout and click the Manage Binding button.
Depending on the selected view, you can assign the layouts to the model, or you can assign the models to the layout, see also Machine Page Layout Views for a comparison of the views.
-
In the view List by Model Name, the following page opens.
In the Layouts drop-down menu, select the desired layouts (from other models) that you want to assign to the selected model.
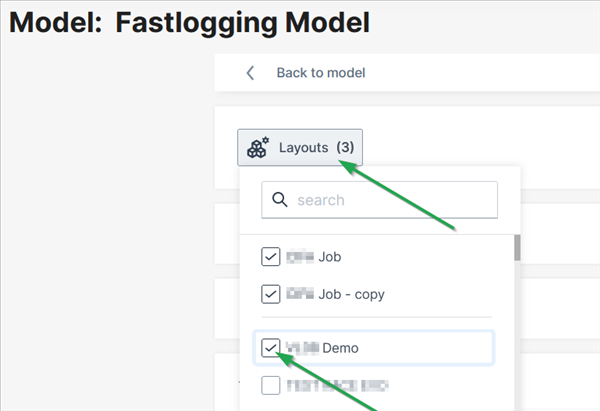
Figure 2: Assign Layouts to Model -
In the view List by Layout Name, the following page opens.
In the Models drop-down menu, select the desired models that you want to assign to the selected layout.
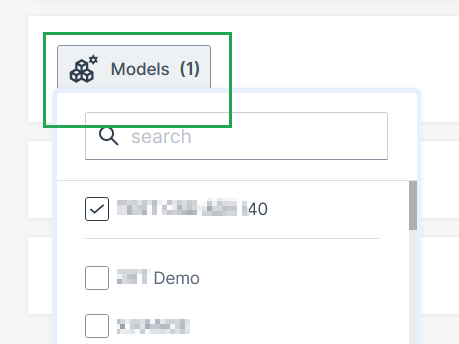
Figure 3: Assign Models to Layout
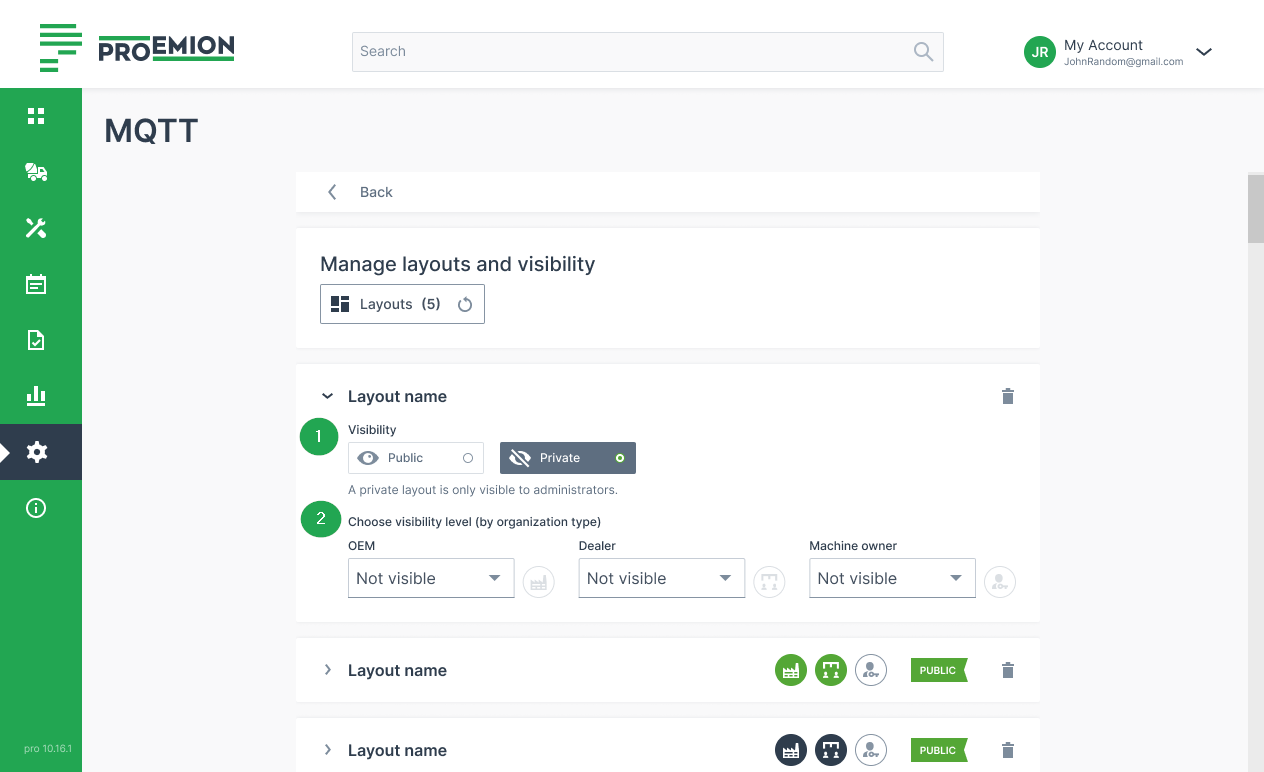
Layout Visibility
The Layout Visibility specifies if the layout is visible to the organizations and which organization type is allowed to view the layout on the dashboard.
Note
Only when the layout is assigned to a model, you may adapt the visibility, see Manage Binding.
To change the visibility, select the desired layout and click the Edit Layout button. The Edit Layout button is located differently depending on the view, see Machine Page Layout Views for a comparison of the views. Alternatively, you can change the visibility directly in the Machine Page; select Manage Layout > Manage visibility for organizations.
In all cases, proceed as follows:
| # | Item | Description |
|---|---|---|
| 1 | Visibility | Specify the visibility of that layout |
| - Public: The layout is available for every organization that is allowed to use it. | ||
| - Private: The layout is only visible to the administrator. This is useful when drafting the layout. | ||
| 2 | Visibility level | Specify which the organization type is allowed to view the public layout: |
| - OEM | ||
| - Dealer | ||
| - Machine Owner | ||
| Specify how the organization type is allowed to view the public layout: | ||
| - Default view - layout is available for the organization type and is selected automatically as the first view when opening the Machine Page. | ||
| - Alternative - layout can be selected on the Machine Page via Machine Page Layout drop-down menu. | ||
| - Not visible - layout is not available. | ||
| 3 | Icons | When the visibility level is set for each organization type (OEM, dealer, machine owner), the icons are colored accordingly. |
| - Green icon: the layout is set as the default layout. | ||
| - Black icon: the layout is set as the alternative layout. | ||
| - No color: the layout is not available to the organization type. | ||
| - Yellow color: the organization type has no layout assigned. |
Create Layout
You create layouts by adding widgets that show the data.
Note
Note that you can't change the assigned layout but only the original one.
Consider that there is also the option to Duplicate Layout where you can adapt the copied layout and/or its widgets.
When a new model machine is added to the DataPortal, it will be assigned a default layout with the Master Data widget.
Note
When an organization type is not allowed to view a layout, the Master Data widget only is automatically shown to users when opening the Machine Page of the model machine. Note that only if tracking is activated in Machine Master Data, location tracking is visible for the time range. Note that Machine Master Data widget is also displayed in case of deleting all layouts assigned to a model, see Delete Layout.
The "create/edit" view can be accessed as follows:
-
In the Machine Page Layout, depending on the selected view (see Machine_Page_Layout_Views):
-
Select the model name and go to the context menu via the
 3-dots icon > Edit layout
 -
Select the layout name and select the
pen icon.
-
-
Alternatively, in the Machine Page, select Manage Layout > Add widgets. The layout opens in edit mode with the configuration pane on the right side:
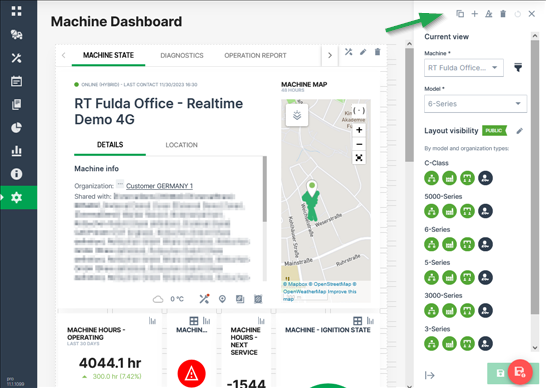
Figure 5: Edit Mode of layout
Add Widget
Note
Note that there is also the Tab Container widget for organizing the widgets in groups. Read Widget Catalog for a detailed description of each widget's configuration.
To add a widget, proceed as follows.
-
To add a widget, select the
 add icon to open the widgets dialog with widgets listed from the Widget Catalog.
 -
Select and configure the widget as described in the Widget Catalog.
-
Once you have completed configuring the widget, save your settings. You can also see a Preview Layout.
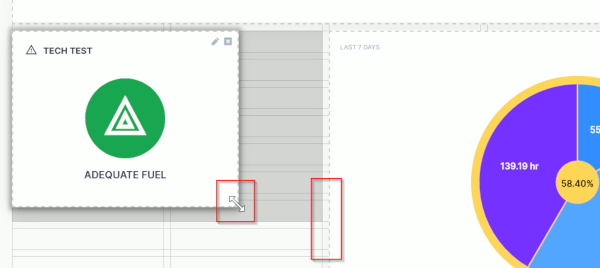
While or after adding the widgets, you can resize or move them by drag-and-drop onto a grid that makes the most efficient use of space.
This is useful, because the display of widget information varies widely, from a single symbol to comprehensive graphs. Proceed as follows:
-
When editing the widget layout, the boundaries for a particular widget are shown as table cells within a broken line boundary.
-
Each widget type has a minimum size
-
There is a shadow under the widget that displays the footprint the widget will take up once you release the resize indicator. If you resize the widget over another widget it will shift to the next available space on the dashboard.
Preview Layout
You can view the layout of the widgets in a preview of the Machine Page. Note that you can only see a preview when the layout has been assigned to a model (see Manage Binding).
-
In the Machine Page Layout, depending on the selected view (see Machine Page Layout Views)
-
select the model name and open the context menu via the
3-dots > See layout. -
select the layout name and select the
view icon.
-
-
In the preview mode, you have the following options:
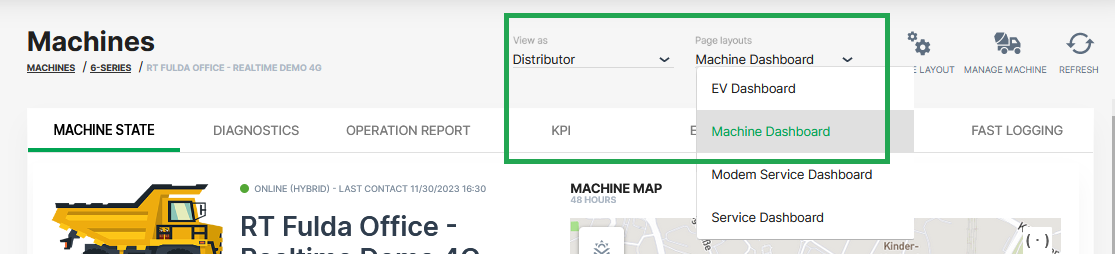
Figure 7: Preview Machine Page -
View as a different org types to see how users view the Machine Page.
-
Change between the Page layouts assigned to this machine model. You can also select private layouts for the preview.
-
Duplicate Layout
You can copy the layout of a model to use it as a basis for a new layout, see Create Layout. Note that also the layout's widgets and their configuration will be copied, too.
Note
Note that you can also assign a layout from a model to another model instead of copying it.
To duplicate a layout, proceed as follows.
-
In the Machine Page Layout, depending on the selected view (see Machine Page Layout Views):
-
select the model name and open the context menu via the
3-dots icon > Duplicate layout. -
select layout name and select the
duplicate icon.
-
-
Alternatively, in the Machine Page, select Manage Layout > Duplicate.
The layout has been now duplicated and in the layout name "copy" has been added to distinguish it from the original layout.
Consider to add a layout description to each layout (can only be seen by the administrator) as the layouts can have the same name.
Delete Layout
In the Machine Page Layout, you can delete layouts completely from the Machine Page Layout or remove only the binding to the model.
Warning
Deleting a layout will delete it for all organizations using it.
Consider the following when removing or deleting a layout that is in use by a model:
-
When the layout was the main layout by the model, the model's secondary layout becomes the main layout.
-
When no other layout exists for the model, basic information (which_is_the_Machine_Master_Data widget) will be shown to the users.
To remove the binding, proceed as follows:
-
In the Machine Page Layout, select the view View list by model name. You can remove a layout from the model only in this view. For more information on the views, see Machine Page Layout Views.
-
Open the context menu via the
3-dots icon and select Remove from model. You can also open the Manage Binding button and select the  delete icon.
To delete a layout completely, proceed as follows:
-
In the Machine Page Layout, select the view View list by Layout Name. You can remove a layout from the model only in this view. For more information on the views, see Machine Page Layout Views. You can delete the layout only in this view.
-
Select the delete icon to remove the layout completely.
-
Confirm the deletion. A warning text will be shown when the layout is in use by a model.