User Management
There are different kinds of user accounts and security configurations that can be set up on the DataPortal:
-
Regular, standard accounts allows user to log into the DataPortal directly, see Create Regular User Account.
-
SSO accounts allow for a centralized login, see Create SSO User Account.
-
MFA (Multi-Factor Authentication) can be enabled to increase the security of user logins by requiring a second factor in addition to the password, see section Multi-Factor Authentication.
Large equipment manufacturers might want to use SSO to access the DataPortal for security (centralized access control), comfort (a single sign-on/authentication to remember) and providing customers with a single landing page for all applications. SSO users can have multiple accounts for multiple applications, including the DataPortal, but only need to log in once.
Overview
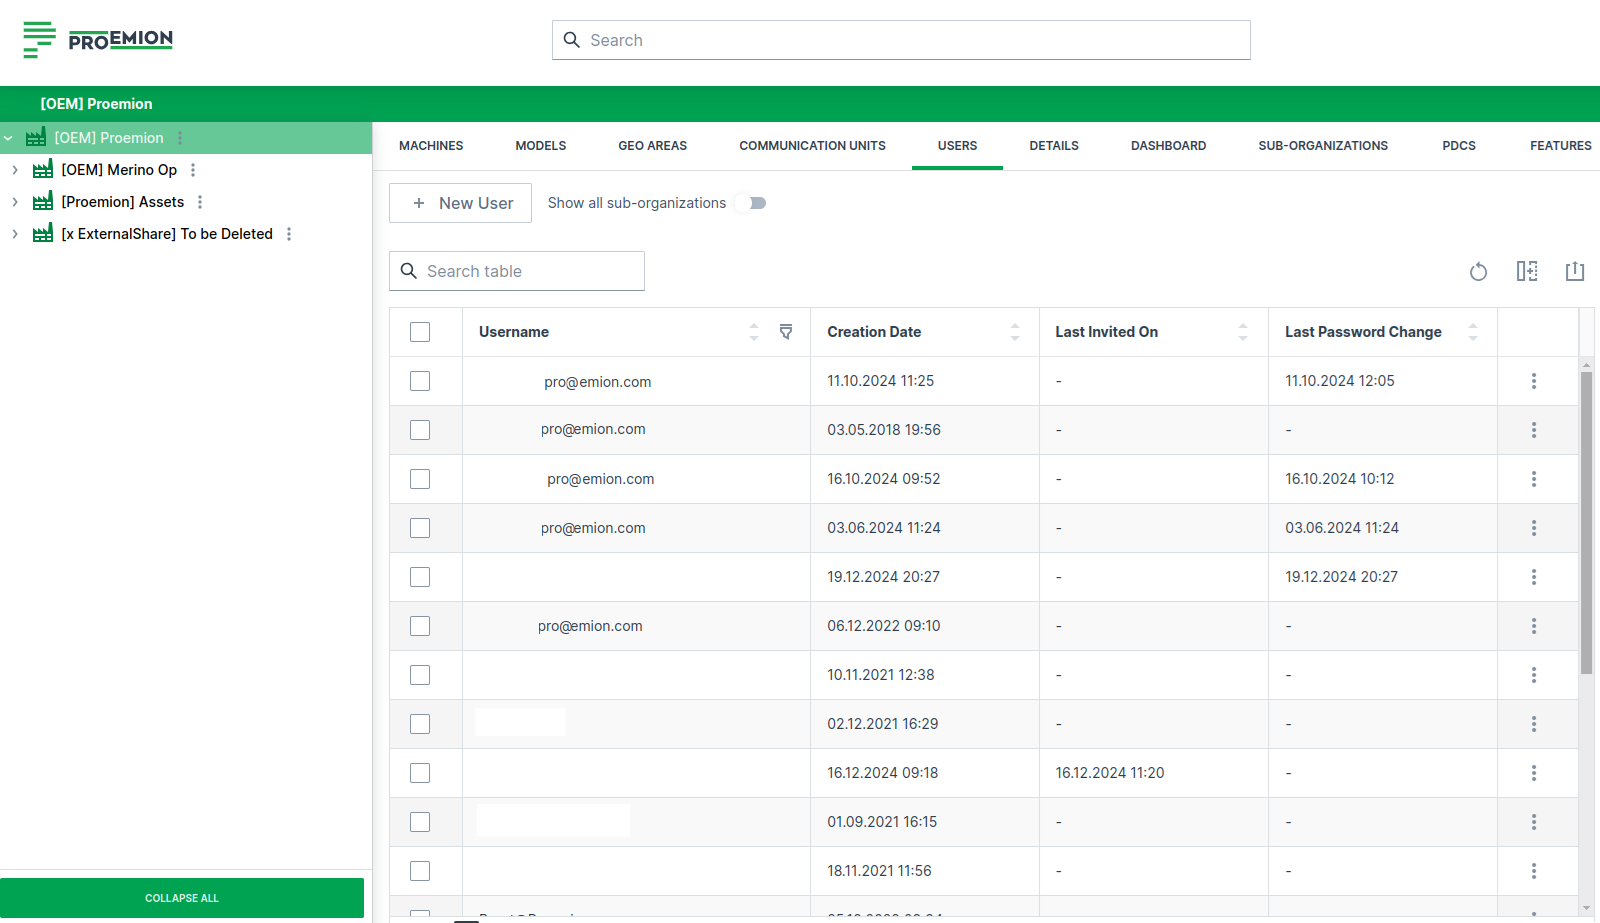
The User Management is to be found at: Settings > Administration > Organization Structure > Users tab.
The Permission Set Organization:Maintain is required for viewing and editing the user management.
The Users tab lists all users in a table and shows additional information on the account activity in different columns, e.g.:
- Type (Regular, SSO)
- Status
- Last Access
- Creation Date
- Last Invited On
- Last Password Change
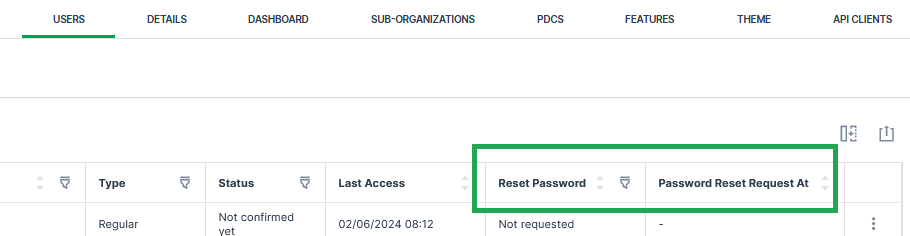
- Reset Password and Password Reset Request At, see also Force Password Reset
Create Regular User Account
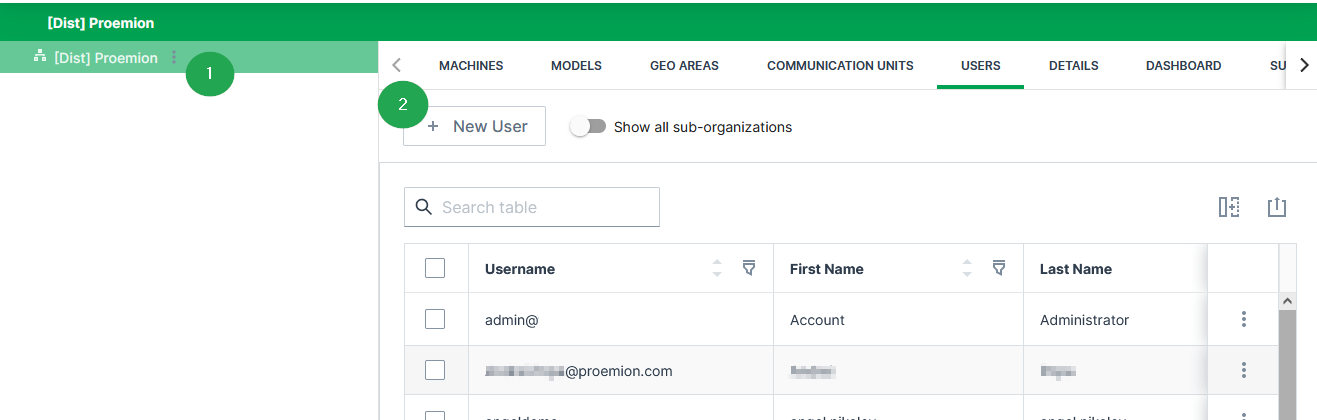
Add users to the DataPortal within the Settings > Administration > Organization Structure > Users tab by following the steps below:
New User
Select the corresponding organization unit in the org tree on the left and click on the New User button to open the dialog.
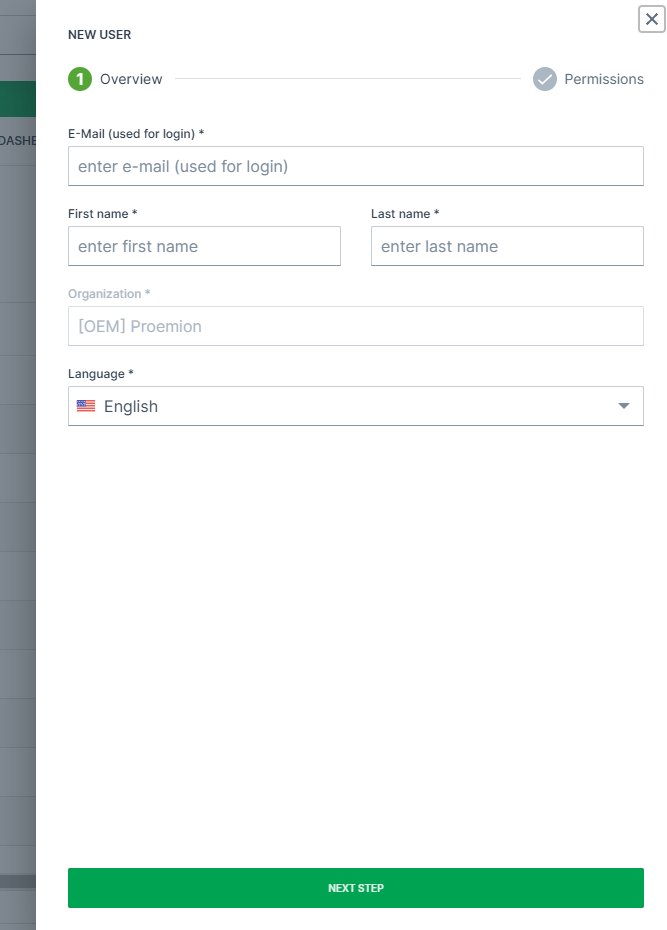
Enter User Details
In the Overview, enter the information for the Regular account:
| Item | Description |
|---|---|
| Email address of the user. | |
| First/ Last Name | First and last name of the user. |
| Organization | The organization the user belongs to in the DataPortal as selected above in New User. |
| Language | The language group the user belongs to. |
Note
For the email address, usually used as the username, it is allowed to use email subaddresses, provided that your email provider supports it.
By that, you can have multiple accounts with 1 email address, e.g. myemail+machine-owner@oem-mail.com
This feature supports Dealers that work on multiple OEMs; there might be many users that need multiple emails to log in to different OEMs' DataPlatform accounts.
It can also help a single OEM's user to create test users for different organization unit types or even subcustomers, e.g. myemail+dealer@oem-mail.com, myemail+customer-a@oem-mail.com.
Note
The DataPortal email/username is NOT case-sensitive. This means john.doe@sample.com, John.Doe@Sample.com and johN.doE@sAmple.com are identical and represent a single user account.
Note
It must be considered that below each specific DataPlatform URL, such as dataportal.proemion.com usernames have to be unique. But identical usernames could appear below separate white-labelled DataPlatform URLs like customer1.proemion.net or customer2.webpage.com. In case a white-label package is required, please get in contact with your Proemion sales representative.
Assign Permissions
After entering the user information in the Overview, select Next Step to assign Permissions.
User permissions can also be managed using predefined User Roles.
After assigning the permissions to the account, select the Submit button to complete the user setup.
After selecting Submit to conclude the process, the user is added to the DataPortal pending email verification.
Email Verification
An invitation link is sent to the user as shown and users are requested to verify their email address.
Note
The invitation link is valid for 7 days.
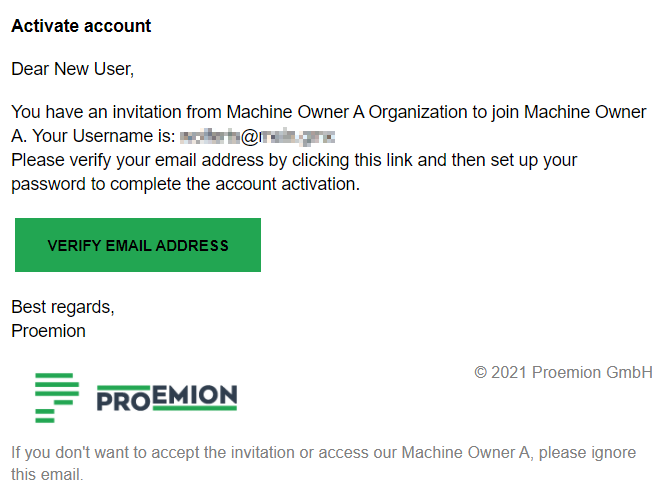
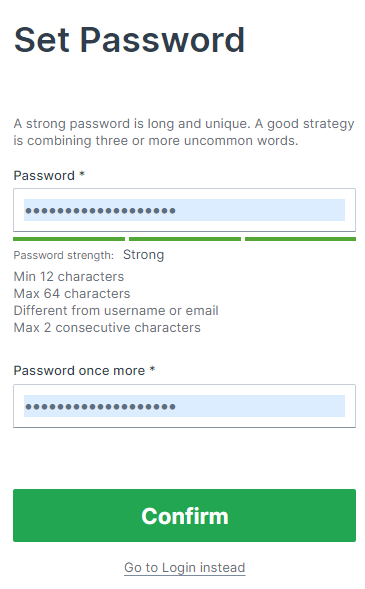
Users are then redirected to the DataPortal where they can set a password before login
For the creation of new passwords, see Password Policy.
Multi-Factor Authentication
When Multi-Factor Authentication (MFA) is enabled, users must authenticate using a second factor (a time-based one-time password from an authenticator app) in addition to their regular login credentials. Once enabled, users will be prompted to configure MFA during their next login.
Enable MFA for Tenant
MFA is configured per tenant by assigning the required Permission Sets to the tenant.
Note
Please contact your Proemion representative to enable MFA for your organization.
Once MFA is enabled for a tenant, users matching the defined Permission Set (or higher) will :
- Be prompted to set up MFA during their next login.
- Be required to enter a valid time based one-time code (TOTP) during each subsequent login.
Upon first login after MFA is enabled, users are shown a QR code to scan using an authenticator app:
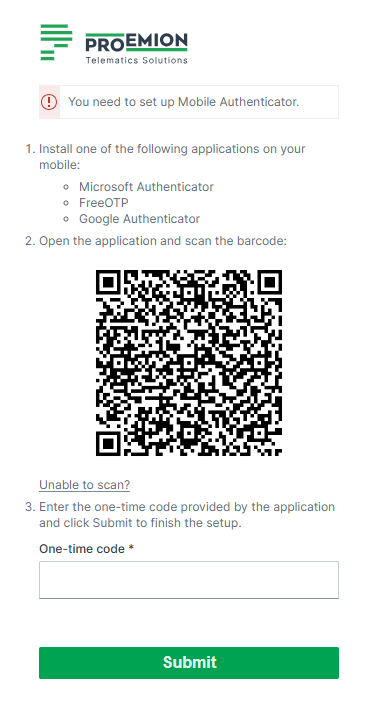
After completing setup, users will be prompted to enter a new one-time code from their authenticator app at each login:

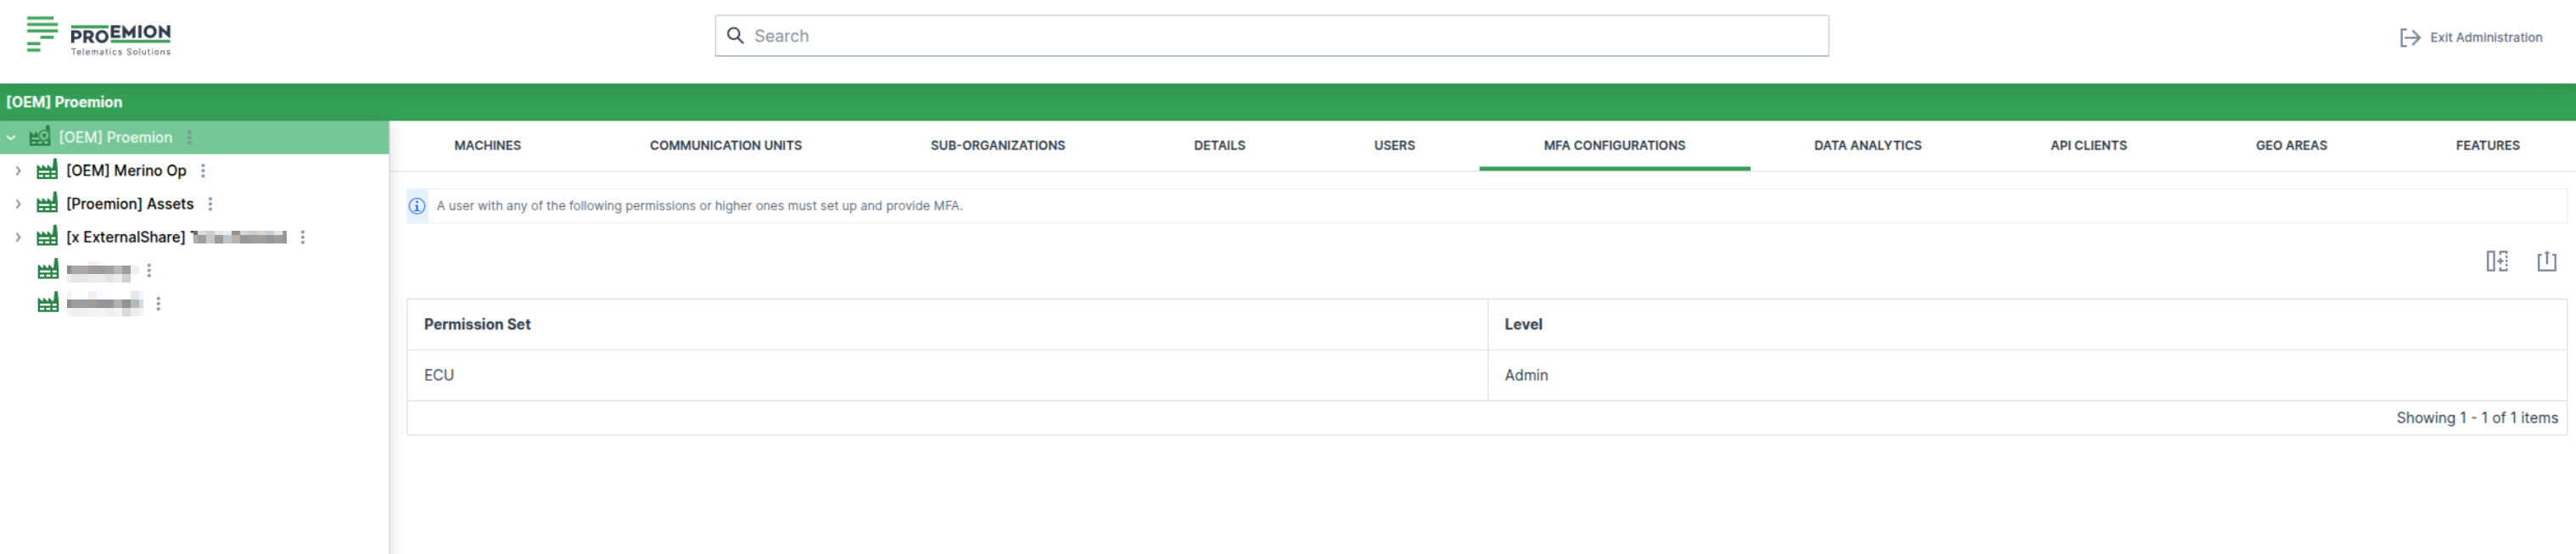
Verify MFA Enabled for Tenant
You can verify whether MFA is active for a tenant by viewing the tenant's permissions.
To do so, proceed as follows:
- Go to Settings > Administration > Organization Structure.
- Select the tenant on the left side and navigate to the MFA tab.
If MFA is enabled for the tenant, a list of Permissions requiring MFA is displayed. Users with one of these Permission Sets (or higher) are required to configure and use MFA.
Verify MFA Enabled for User
To check whether MFA is enabled for a specific user, proceed as follows:
- Go to Settings > Administration > Organization Structure.
- Navigate to the Users tab.
- Look for the MFA Enabled column. If MFA is enabled for the user, this column will display Yes.
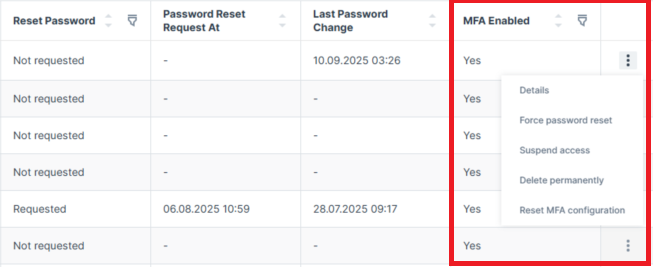
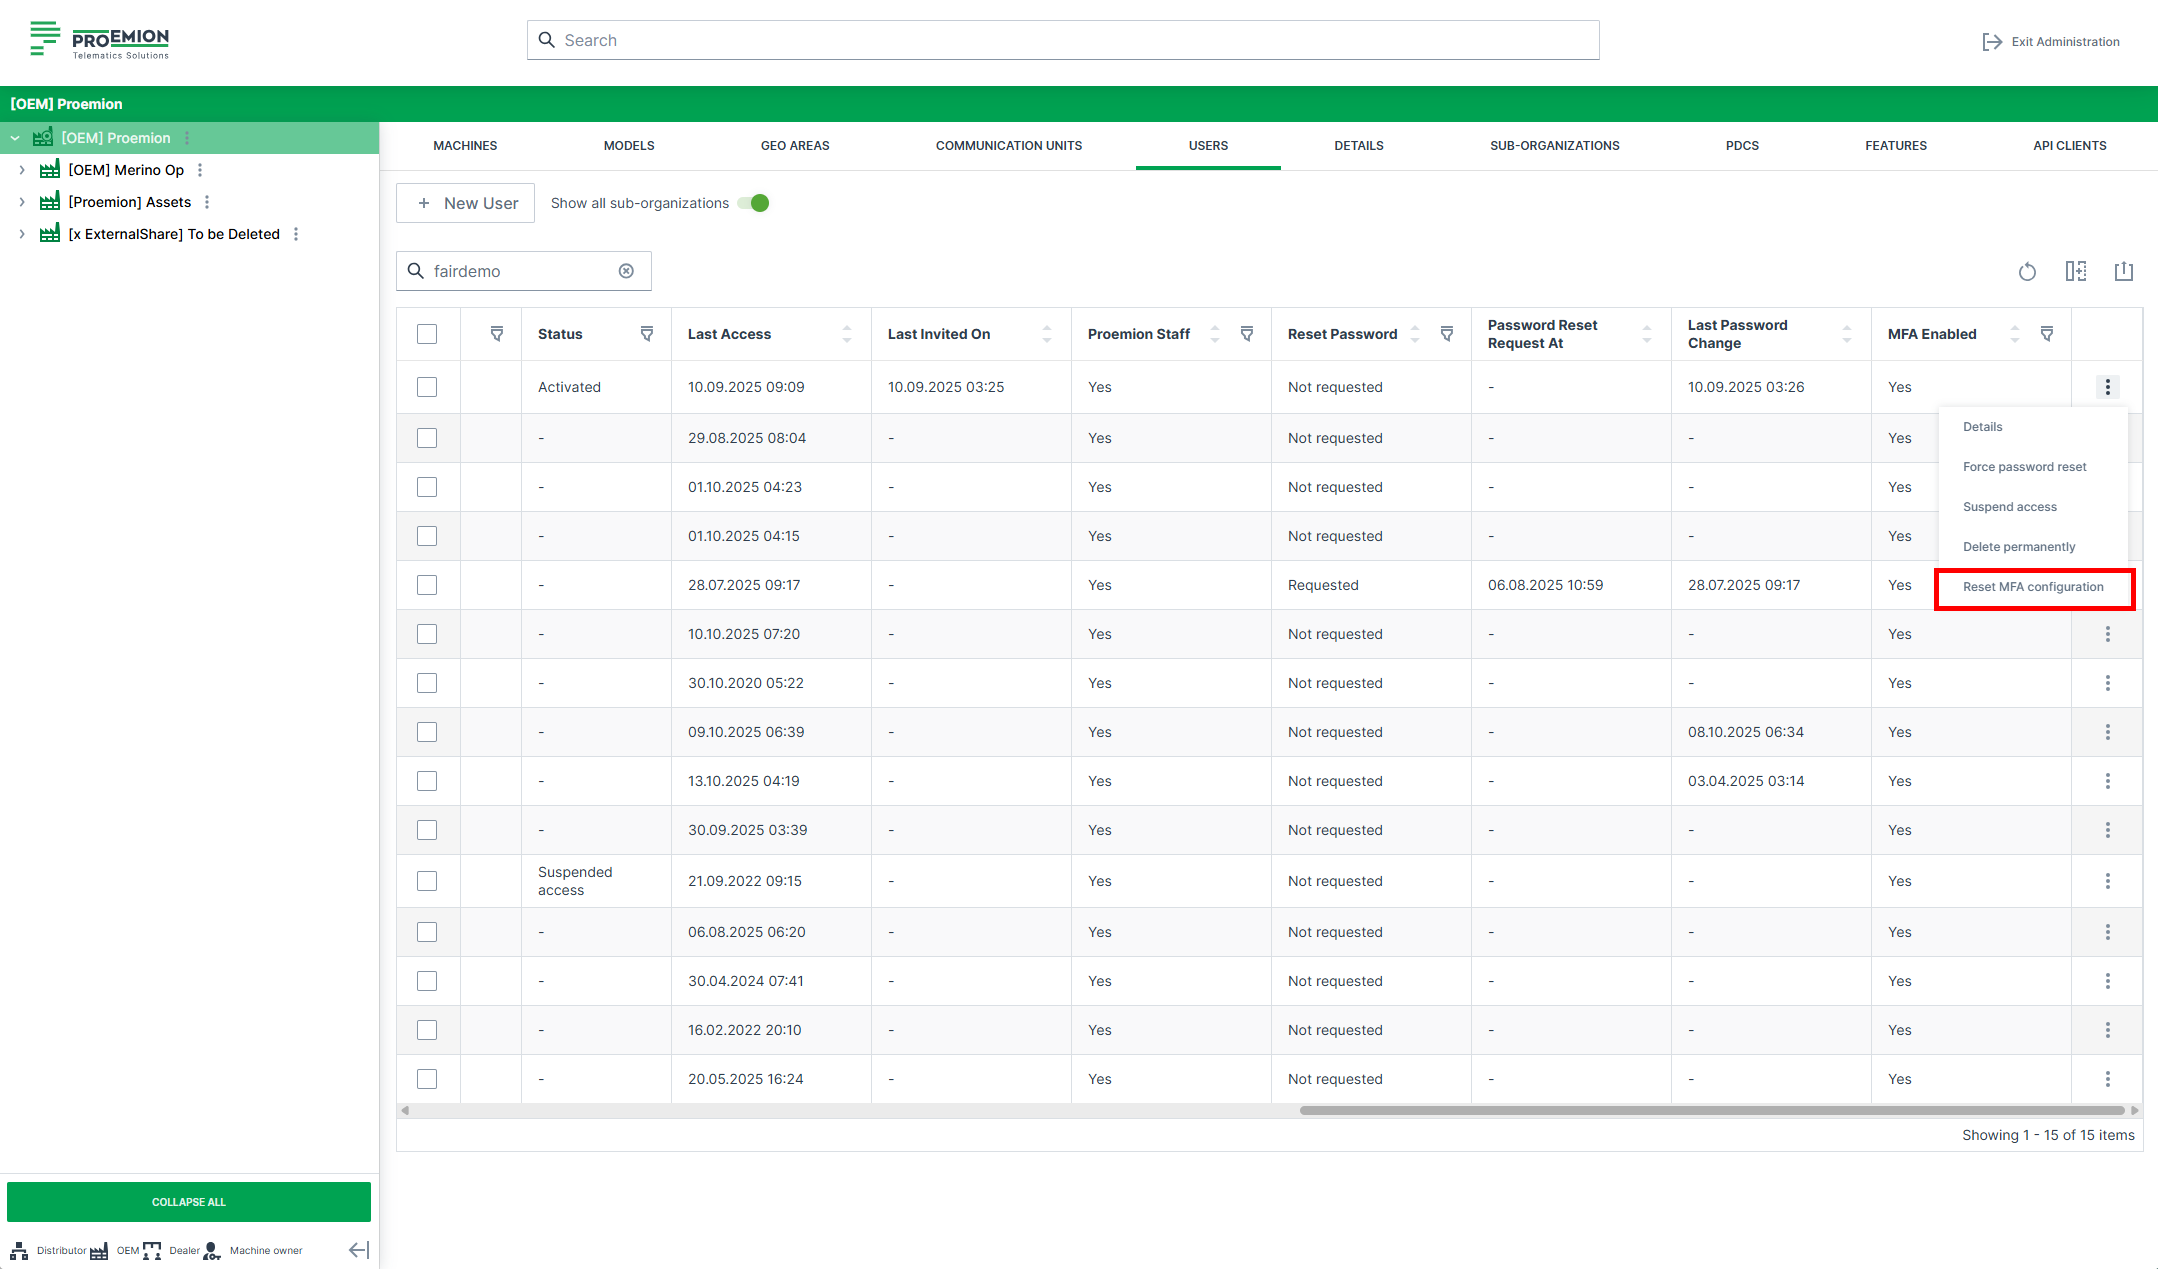
Reset MFA for a User
If a user no longer has access to their MFA device (e.g. due to a lost phone or removed authenticator app), a system administrator can reset their MFA configuration. To reset MFA, proceed as follows:
- Go to Settings > Administration > Organization Structure.
- Navigate to the Users tab.
- Open the 3-dots menu at the end of the row of a user and choose one option of the following from the context menu:
- Select the Reset MFA option.
-
Select the Details option and click the Reset MFA Configuration button.
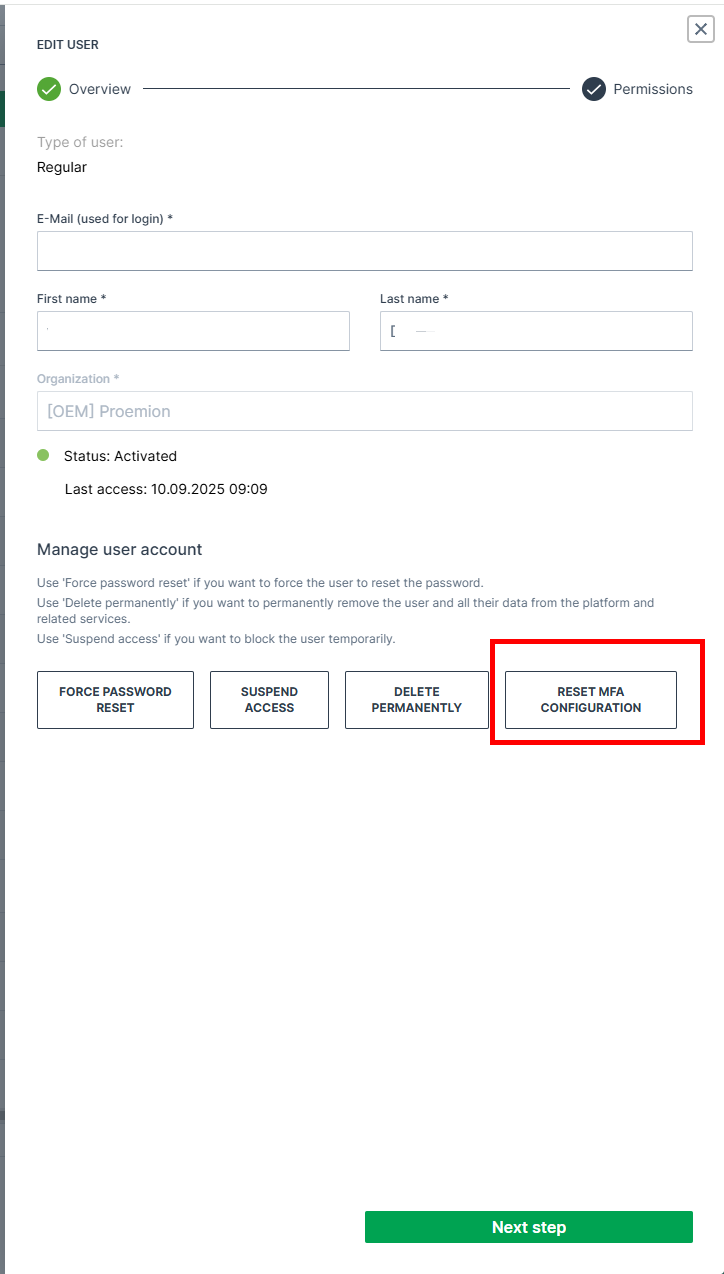
Figure 10: MFA Reset via Edit User menu -
Click Confirm in the reset dialog.
Warning
Resetting MFA does not disable it. The user will be required to reconfigure MFA at the next login. The user will then be prompted to set up MFA again during their next login.
Create SSO User Account
The authentication (confirmation of your identity) of SSO users is performed by the configured identity provider, whereas the user permissions and their organization assignment are managed on the DataPlatform.
We recommend doing this automatically on the user login by setting up a customized mapping from attributes in the identity provider like roles to organization units and permissions in the DataPlatform.
Note
By doing so, the manual creation of one or both "regular" and "SSO" user types can be disabled by Proemion and the New User button won't be displayed
This might be needed for organization units that are not tenants.
Alternatively, SSO users can be created manually in the DataPortal
The account creation can only be performed by authorized users
Add users to the DataPortal within the Settings > Administration > Organization Structure > Users tab by following the steps below:
New SSO User
Select the corresponding organization unit in the org tree on the left and click on New User button to open the dialog.
Use the SSO form:
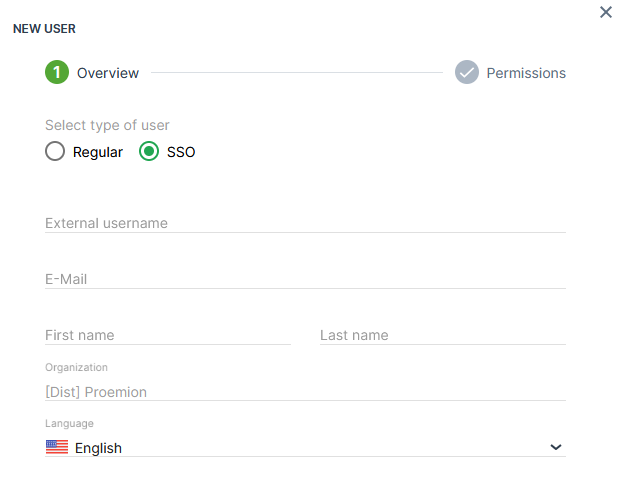
| Item | Description |
|---|---|
| External Username | This is the name of the account in the SSO identity provider. |
| E-Mail1 | Email address of the user. |
| First/ Last Name1 | First and last name of the user. |
| Organization1 | The organization the user belongs to in the DataPortal as selected in New SSO User. |
| Language1 | The language group the user belongs to. |
Assign Permissions
After entering the user information in the Overview, select Next Step to assign Permissions.
After assigning the permissions to the account, select the Submit button to complete the user setup.
Note
SSO users do not receive an invitation link.
View and Edit User
To view and edit users in an organization, you must first select the organization in the org tree on the left of the panel, then select Users from the top menu bar
This view lists all the users in the selected child organization.

-
Select Details to the right of the user to open the Edit User dialog.
-
Adapt the fields as desired and proceed to the Next Step.
-
In Permissions, adapt the user access for the Subjects.
-
Click Submit to save the changes.
Note
The link to verify a new email address is valid for 4 hours.
Note
The organization corresponds to the structure displayed in the org tree and cannot be changed.
Move Users across Organizational Units
Users can be moved across Organization Units as follows:
-
Select the user(s).
-
Activate the checkbox of the user(s).
-
The Organization tree will appear in the Select Organizations dialog on the right.
-
Select the target organization.
-
Click Move User on the bottom right to apply the change.
Force Password Reset
DataPortal Admins can force a password reset for users.
Users with a pending forced password reset cannot log in, until they have requested a new password in the login mask and completed the password reset, see Password Reset.
Note that after forcing a password reset, the users receive no email unless they reset the password.
To force the password reset, proceed as follows:
| Permission Set Name | Level |
|---|---|
| User | Admin |
-
Open the Settings > Administration > Organization Structure > Users tab.
-
Open the drop-down menu by the end of the row of the user.
-
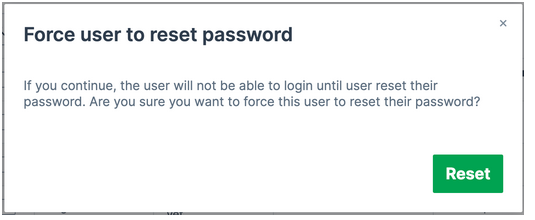
Select the Force password reset option.
-
Confirm the reset in the dialog window:
In the Users table, you can then view whether a user has a forced password reset and when it was requested:
Suspend Users and Inactive Users
-
To suspend access for the DataPortal account, open the Details of the user account.
-
In the Edit User dialog, click the Suspend access button and the user will not be able to login to the application.
-
To re-activate an account, click Restore access.
Inactive users that meet the following criteria will be removed from the system automatically:
- users that have no account activity in more than a year AND never logged in
OR
- no login over 3 years AND no account activity for 2 years
To comply with GDPR, once a month user-accounts that meet the above criteria are removed from the system.
Note that as an admin you may also Force Password Reset.
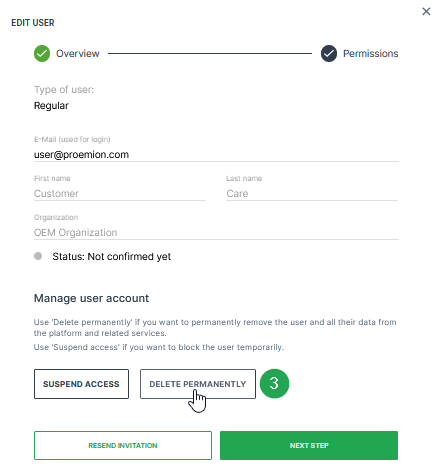
Delete Users
Use Delete permanently if you want to permanently remove the user and all their data from the platform and related services.
Required permission:
| Permission Set Name | Level |
|---|---|
| Organization | Admin |
Users can be deleted as follows:
-
Select the user.
-
Activate the check box next to the user.
-
Click on Delete permanently.
✓ The message User has been successfully deleted. will appear in the upper right corner.