Assignments
The Assignments functionality provides machine owners with the capability to create usage-based reports that track specified machine signals/counts according to the machine's jobs and tasks for bookkeeping/service tracking purposes
An Assignment can be created for an individual or a group of machines, for an individual or group of organization units
For a signal, such as fuel consumption or operating hours, to be available as an Assignment the signal must be configured as Counter in every PDC that is assigned to a Model or a Machine in the Organization, including Sub-organizations
You can also track these signals for your machines by creating a widget.
Note
In order to use the Assignments, it is essential to use standardized and harmonized metrics in the PDC files. For further details, refer to the Signal Catalog, the Proemion Standard Metrics and the PDC Manual.
Assignments Control Panel
You can view Assignments for your organization by selecting Assignments from the left-side menu to open the control panel. Here you can perform further actions:
-
Create
-
Clone
-
Export

| # | Item | Description |
|---|---|---|
| 1 | Short Description | The title, key, dates and status of the assignment. |
| 2 | Create | Create a new Assignment. |
| 3 | Filter | Select and apply filters to the Assignments list shown. |
| 4 | Sort | Set the filter criteria for the order of the Assignments in the list. |
| 5 | Export | Export all assignments with any kind of filter set or without filters as CSV and XLSX. The export file also includes additional information like the serial number of the machine. |
| 6 | Description | Text explaining the Assignment objective. |
| 7 | Machines | Machines included in the Assignment. |
| 8 | Signals | Signals included in the Assignment. |
| 9 | Delete | Remove the Assignment from the system. |
| 10 | Clone | Open the Clone Assignment dialog with options already populated. |
| 11 | Edit | Open the Edit Assignment dialog with options already populated. |
If you already have Assignments in place, you can generate a report.
Create New Assignment
Note
Clone and Edit Assignment dialogs are identical to the Create Assignment dialog explained in the next section.
-
Click Assignments from the left-side menu.
-
Click the Create icon
 to open the dialog and enter the configuration options shown in the screenshot below.
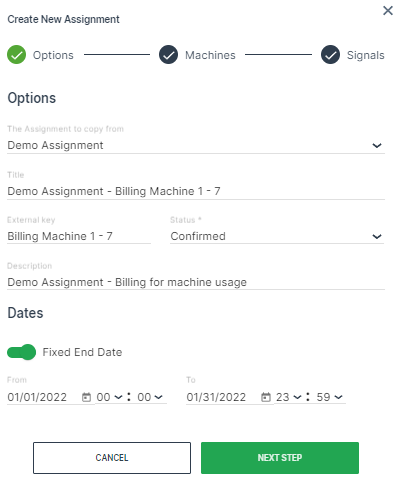
Figure 2: Assignments Dialog
| Option | Description |
|---|---|
| The Assignment to copy from | Select an Assignment to use as a template. |
| Title | Assignment identification |
| External Key | Free text (i.e. contract or invoice ID, etc.) provided by the machine owner. |
| Status | Draft: The Assignment is created but the start date is still in the future. |
| Confirmed: The contract is signed and the Assignment is confirmed. | |
| Archived: Deactivated Assignment. | |
| Description | Text explaining the Assignment objective. |
| Dates | Fixed End Date*: Toggle an end date for the Assignment. Otherwise, it wil generate reports indefinitely. |
| From: Assignment start date and time. | |
| To: Assignment end date. |
!!!tip *An Assignment intended to run indefinitely can be defined without an end-date so that a manual completion must be executed. Once the end date has been reached, the Assignment is concluded.
- Once you have entered the data in the Options tab, click Next Step to select the Machines.
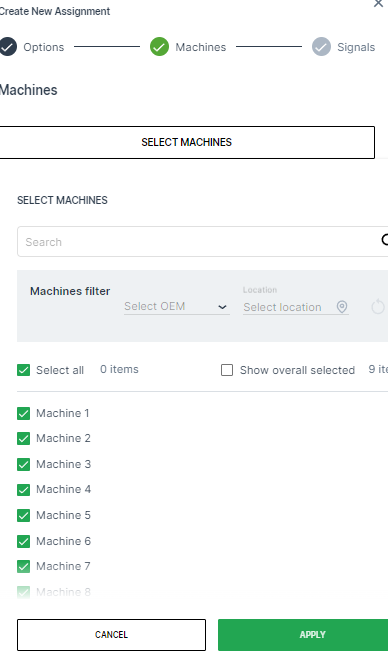
- Once you have selected the machines for the Assignment, click Next Step to select the Signals.
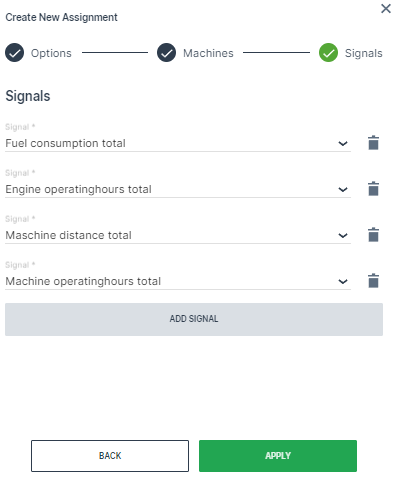
| Item | Description |
|---|---|
| Signal | Drop-down list of available signals. |
| Add Signal | Add additional signals to include in the Assignment. |
| Apply | Create the new Assignment. |
- Click Apply to create the Assignment.
When the Assignment has been successfully created, a message appears stating A new Assignment has been created. It may not be visible due to your current filters.
Generate Reports
To generate a report from an existing Assignment:
-
Open Reports > Assignments.
-
Select the Assignment you want to generate a report for from the drop-down list.
-
Optionally, change the
FromandTodates if you need to view another time period.
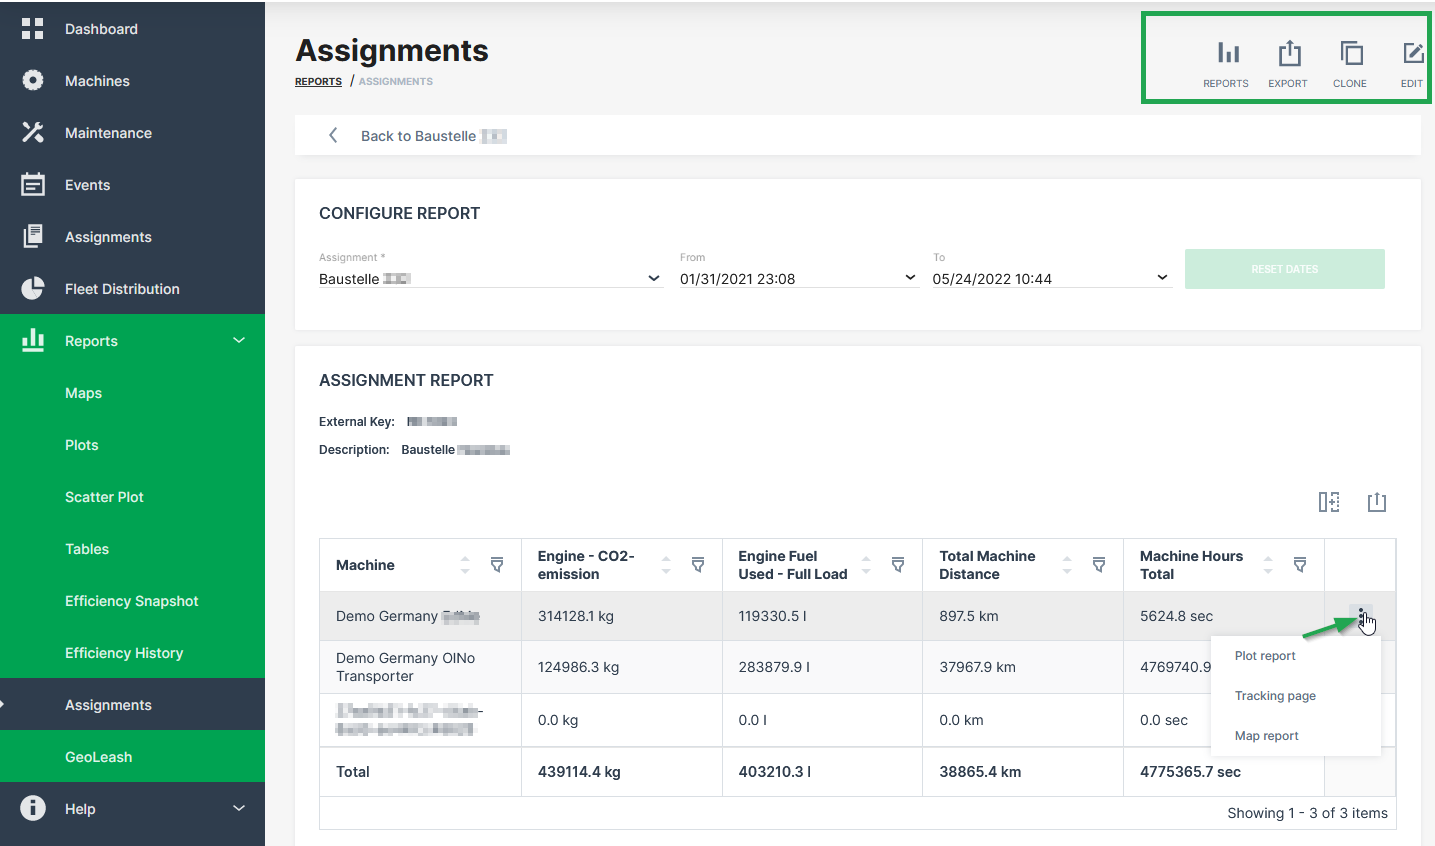
An aggregated report is generated as well as a report for each machine that you can open in the format of Tracking page, Map report and Plot report.
In the top menu of the Assignments Reports page, the following options are available:
-
Map report: Open the Location Reporting configuration.
-
Plot report: Open the plot configuration.
-
Export: Generate a CSV or PDF file that contains the Assignment report data.
-
Clone: Duplicate the Assignment configuration.
-
Edit: Edit the Assignment configuration.
Generate Email Notification
To get informed when the assignment is at status completed, it is possible to subscribe for an email notification within the user account settings.
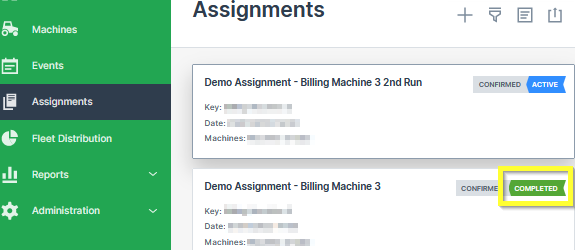
The status of the assignments can be verified at the Assignments Control Panel
The notification gets triggered when the right status indicator is at COMPLETED:
formalpara-title Assignment Status
-
Click on My Account > Notifications.
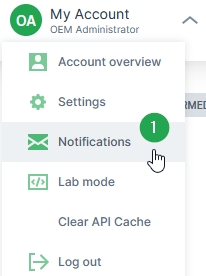
Figure 6: Subscribe for Assignment Notification -
Enable the toggle switch for Assignment Completion.
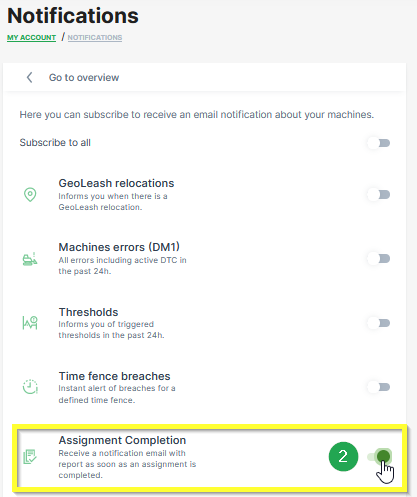
Figure 7: Enable Assignment Completion An email with a summary and a link to the corresponding assignment is sent to the configured email address of your user account:
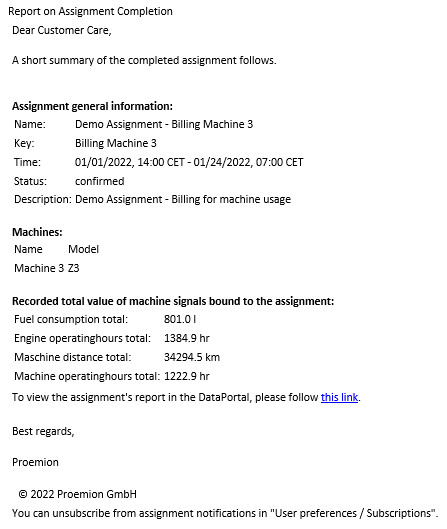
Figure 8: Assignment Completion Notification
Note
The interval of the cyclic assignment completion check for notifications is 30 minutes. After the assignment has been recognized as completed, there may be a maximum delay of 30 minutes in sending the email.
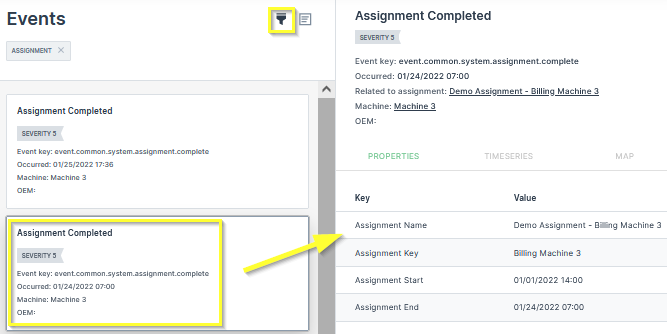
Generate Event
When an assignment is marked as completed, it will also appear in the DataPortal Events list.