Install the nano-SIM card
This chapter describes how to properly install the nano-SIM card in the CANlink® mobile 10000 device.
Note
Ensure the device is powered off before proceeding. Observe all ESD protection measures: wear a grounding wrist strap, work on an antistatic surface, and avoid touching any other components on the PCB.
Open the Housing
Open the housing using the CANlink® mobile Opening Tool. For detailed instructions, refer to CANlink mobile Opening Tool manual.
Note
Open the housing only for the purpose of inserting or replacing the nano-SIM card. Use only the approved CANlink® mobile Opening Tool and follow the instructions carefully.
Insert or Replace the nano-SIM card
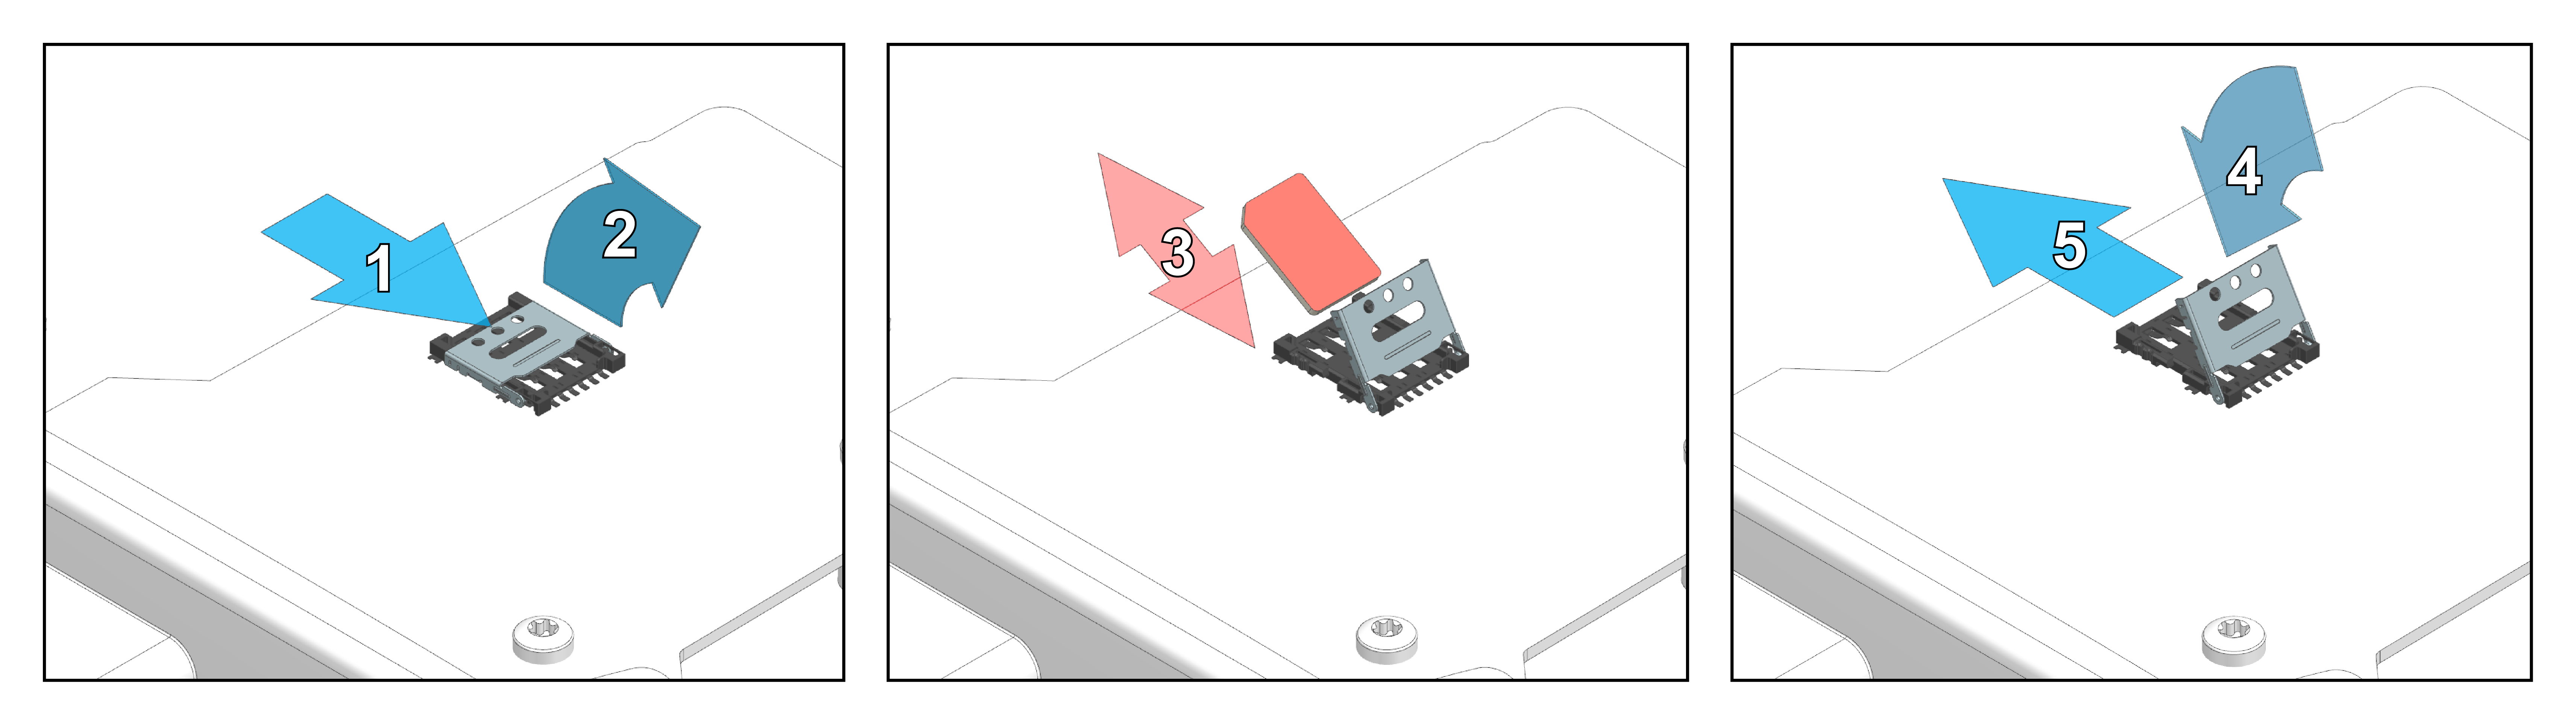
The following figure shows the steps required to insert or replace the nano-SIM card.
Note
Handle the nano-SIM card with care. Do not force or bend the nano-SIM card during installation.
The nano-SIM card holder is located on the top side of the PCB assembly.
To install the nano-SIM card, proceed as follows:
- Slide the metal shell to unlock the SIM card holder.
- Flip the metal shell open.
- Insert or replace the nano-SIM card carefully. Make sure the chamfered corner aligns correctly with the holder.
- Fold the metal shell back down.
- Slide the metal shell into the locked position until it is securely locked in place.
Close the Housing
Note
Before closing the housing, ensure the nano-SIM card lies flat and is properly seated in the holder.
The housing is equipped with two click fasteners, which must be closed separately and sequentially. Apply force only at the designated pressure points. These pressure points are located at the outer edge of the cover on the short sides, aligned with the click fasteners. Closing the housing requires a higher level of force at these pressure points.