Log Data using the CANlink® mobile 10000 Library
First you have to set up a new CODESYS project for the CANlink® mobile 10000.
To do so, follow these steps.
Create a new CODESYS Project
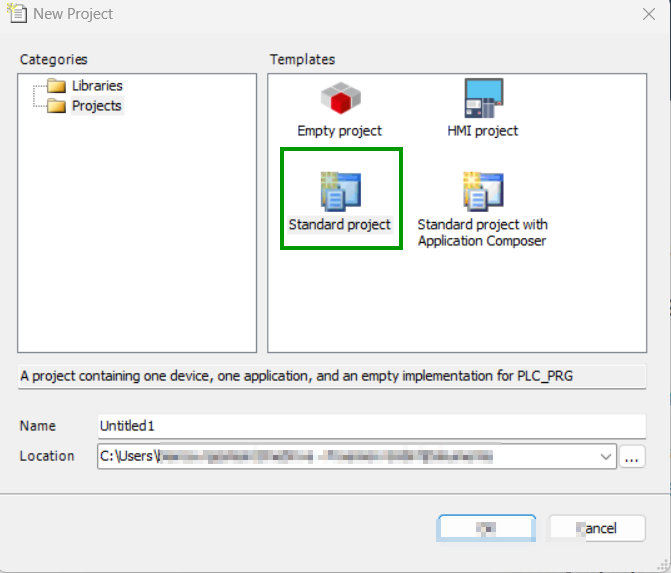
Open the CODESYS IDE, create a new project via File → New Project → Standard Project and choose a Name and Location for your project.
Select Device and Programming Language
Select Device and PLC_PRG in.
- Select Device: CODESYS Control for Linux ARM SL
- Choose programming language for PLC_PRG: Structured Text (ST)
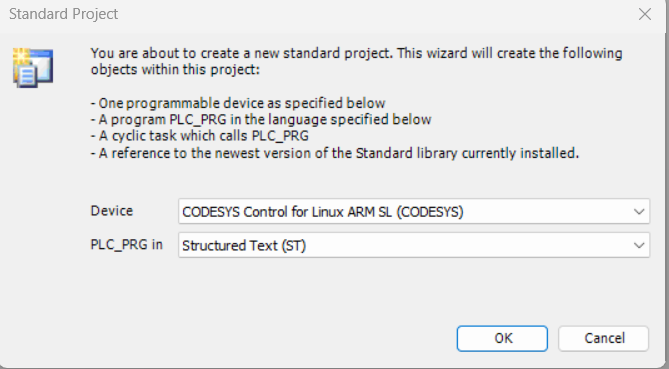
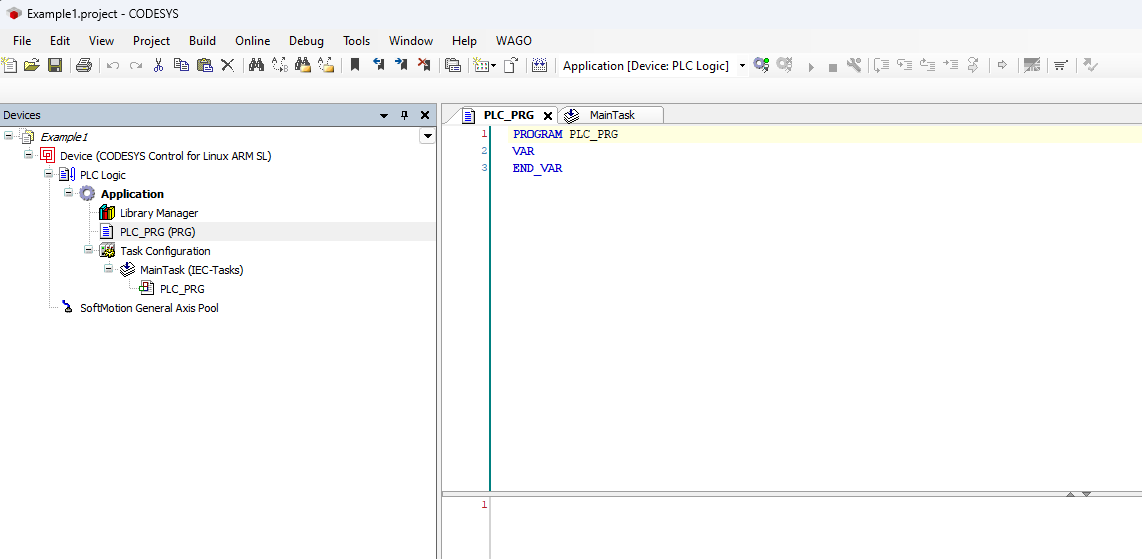
If the device CODESYS Control for Linux ARM SL is not available, it may not be installed. Read Install CODESYS dependencies for installation instructions. An empty project similar to the following screenshot should be created.
Enable CODESYS Runtime on the CANlink® mobile 10000
Before adding the CANlink® mobile 10000 library or programming, ensure the CODESYS Runtime is enabled on the device:
- Open a web browser and access the device’s IP address.
- Log in to the web interface.
- Navigate to Advanced Settings > CODESYS Settings.
- Enable the option Enable CODESYS Runtime.
- Save the settings (restart the device if required).
Once enabled, the device is ready for CODESYS connection and library integration.
Add the CANlink® mobile 10000 CODESYS Library
Add the CANlink® mobile 10000 CODESYS library to your project.
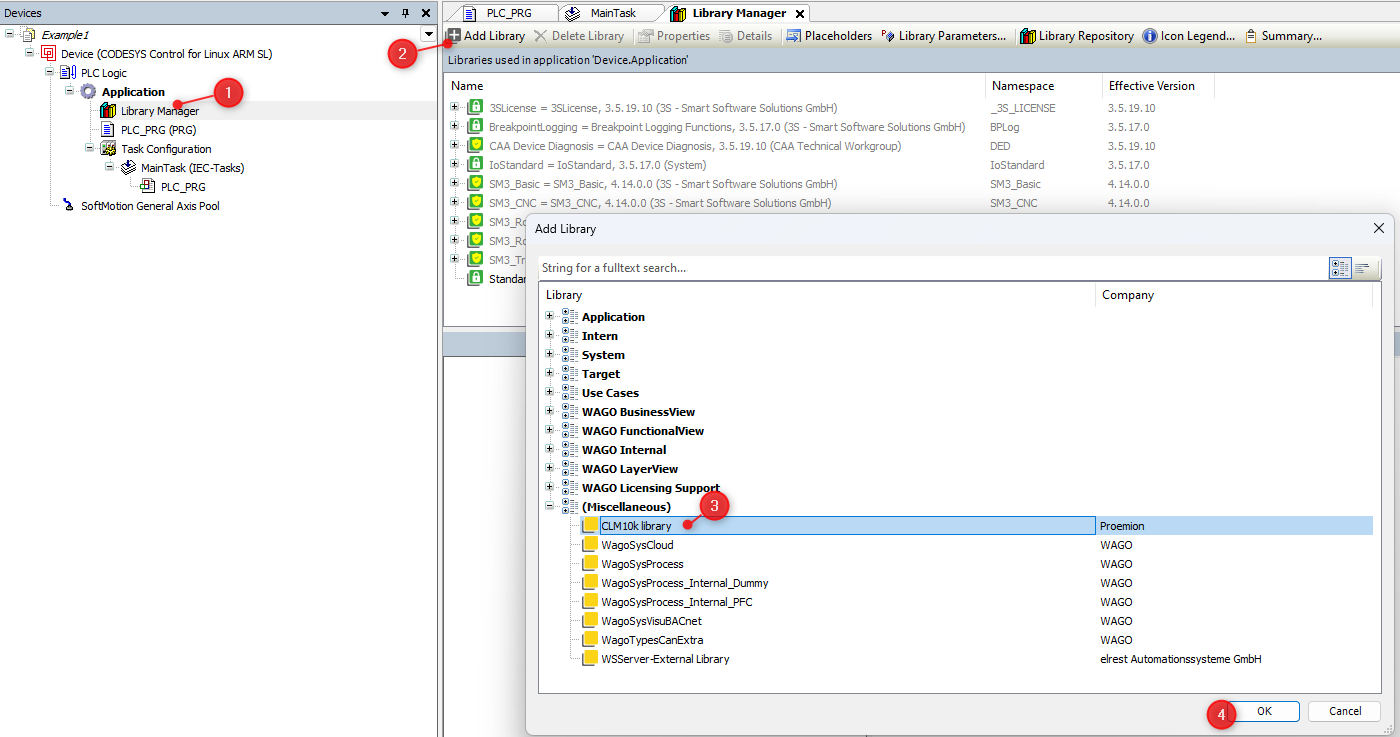
1. Open the Library Manager in the Devices tree on the left side of the CODESYS IDE, expand the Application node under your device and double-click on Library Manager.
2. Click the + Add library button in the Library Manager toolbar at the top of the screen. This opens the Add Library window, allowing you to search and add new libraries to your project.
3. Search and select the CANlink® mobile 10000 library.
4. Click OK in the bottom-right corner of the window to confirm your changes.
 If you can not find the CANlink® mobile 10000 library, it may be not installed.
Read Add Proemion CANlink® mobile 10000 Library for installation instructions.
If you can not find the CANlink® mobile 10000 library, it may be not installed.
Read Add Proemion CANlink® mobile 10000 Library for installation instructions.
Example
The following example provides a detailed step-by-step instruction
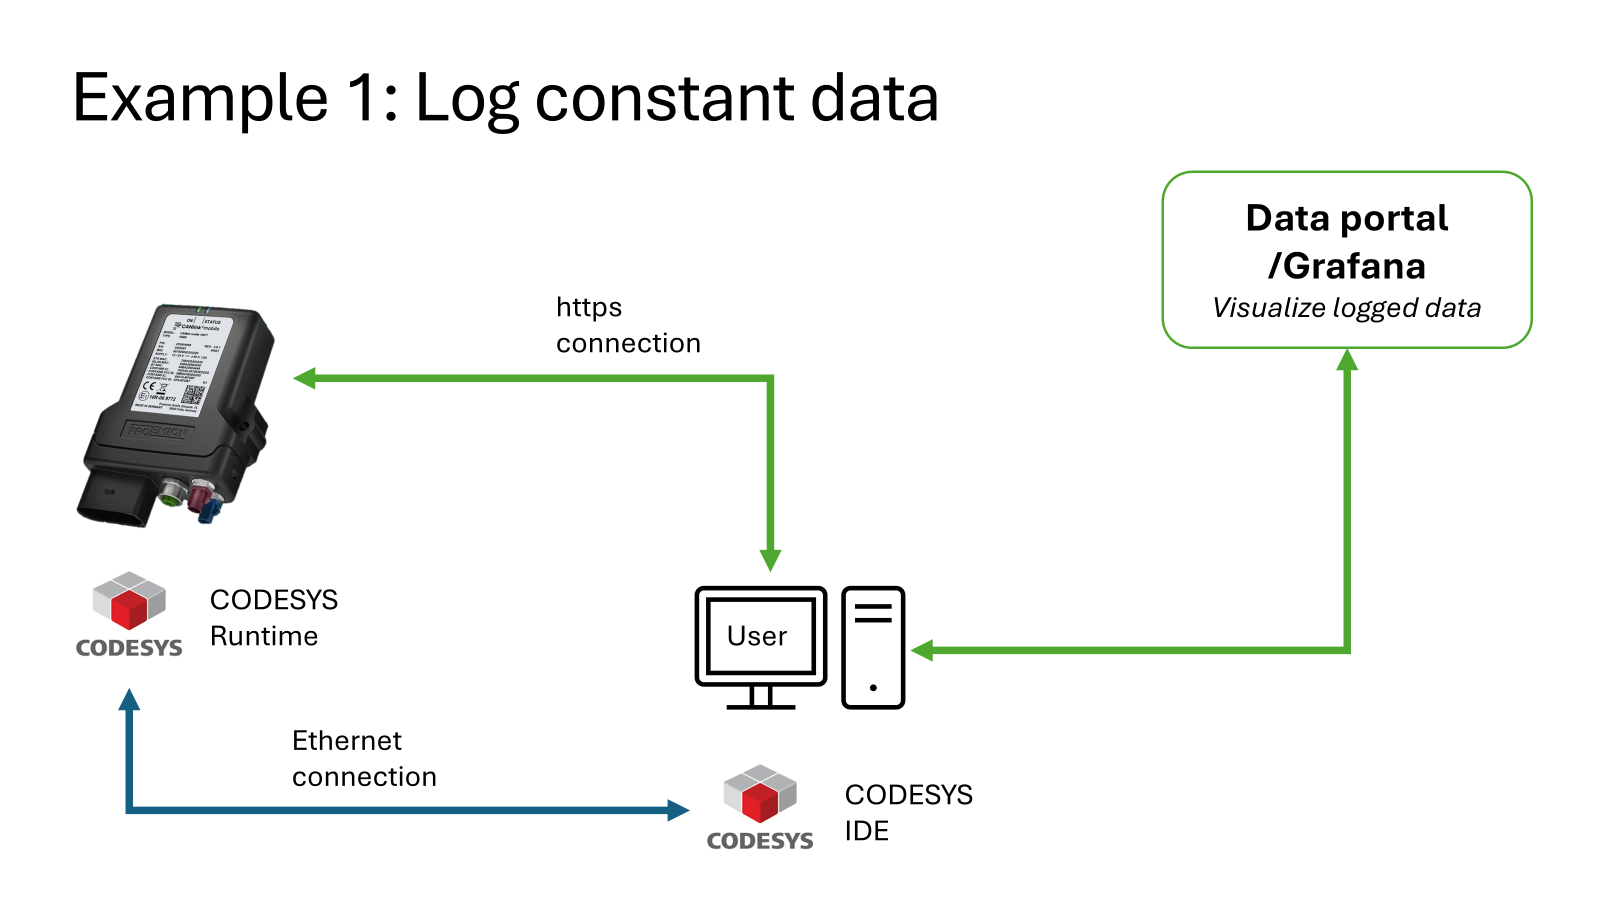
The diagram below illustrates how the CANlink® mobile 10000 logs constant data and transmits it over HTTPS to the DataPortal for visualization, while the user interacts with the system through the CODESYS IDE over an Ethernet connection.
-
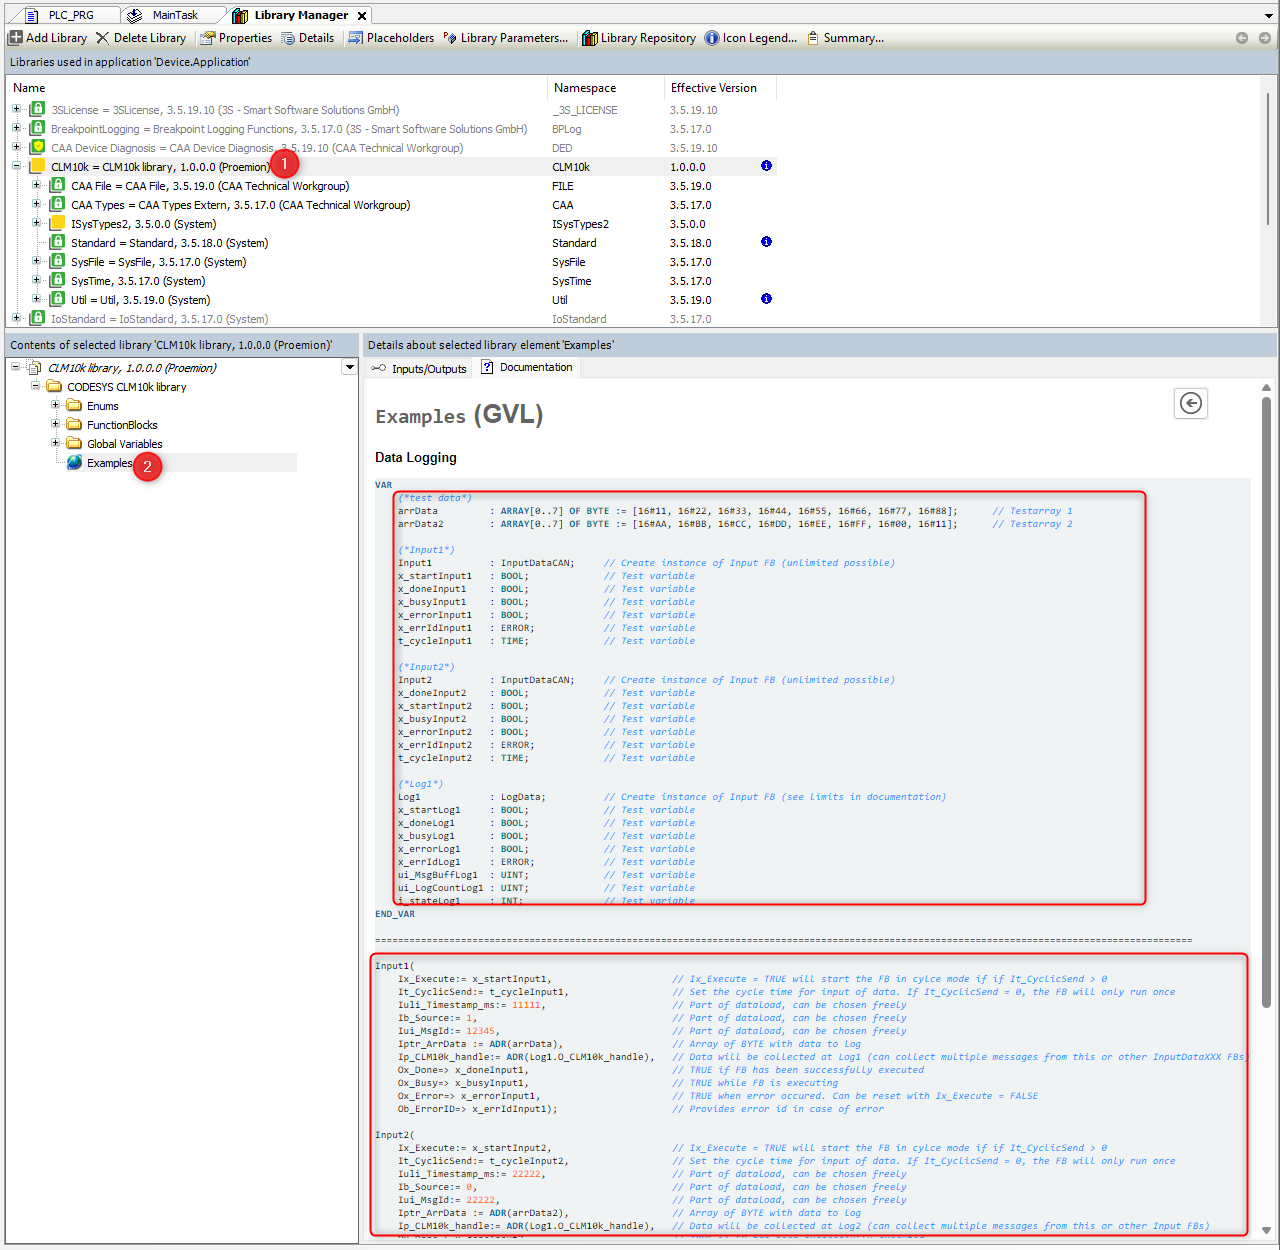
The library comes with an example embedded into the documentation. The following Screenshot shows you how to find it. Copy and paste it into your main program PLC_PRG. The code may vary slightly depending on the version of the CANlink® mobile 10000 library you are using.
- 1: Open the CANlink® mobile 10000 library contents in the Library Manager, under the list of included libraries. Click on CANlink® mobile 10000
Proemion to select it. This displays the contents and structure of the library in the bottom-left panel. - 2: To open the example code, navigate to CANlink® mobile 10000 library > Global Variables > Example and click on Examples.
This opens the GVL (Global Variable List) Examples, which contains predefined test variables, logging structures, and example logic for input and output configuration using the CANlink® mobile 10000 library.
- 1: Open the CANlink® mobile 10000 library contents in the Library Manager, under the list of included libraries. Click on CANlink® mobile 10000
-
Navigate to Build > Generate Code in the top menu to compile the project. Ensure that no errors or warnings appear in the message window at the bottom of the IDE.
-
Connect to the device. You can use the Scan Network to locate your CANlink® mobile 10000 device.
- 1: Select the device. In the Devices tree on the left side of the CODESYS IDE, click on your target device entry, e.g. Device (CODESYS Control for Linux ARM SL), to select it and enable access to communication and configuration options.
- 2: Open Communication Settings. With the device selected, open the Device tab at the top of the IDE and click on Communication Settings in the left-hand menu to open the network configuration view for connecting to your target hardware.
- 3: Click on Scan Network to find your device. If you can not find it you can also enter the IP address; in the Communication Settings window, enter the IP address of your CANlink® mobile 10000 device (e.g.
10.30.10.110) into the input field on the right, press Enter to scan and connect, and if prompted, enter the device User name and Password in the login dialog to authorize access. The User name and Password must be set the first time you connect via CODESYS. For further information read also the CODESYS Project Protection Documentation.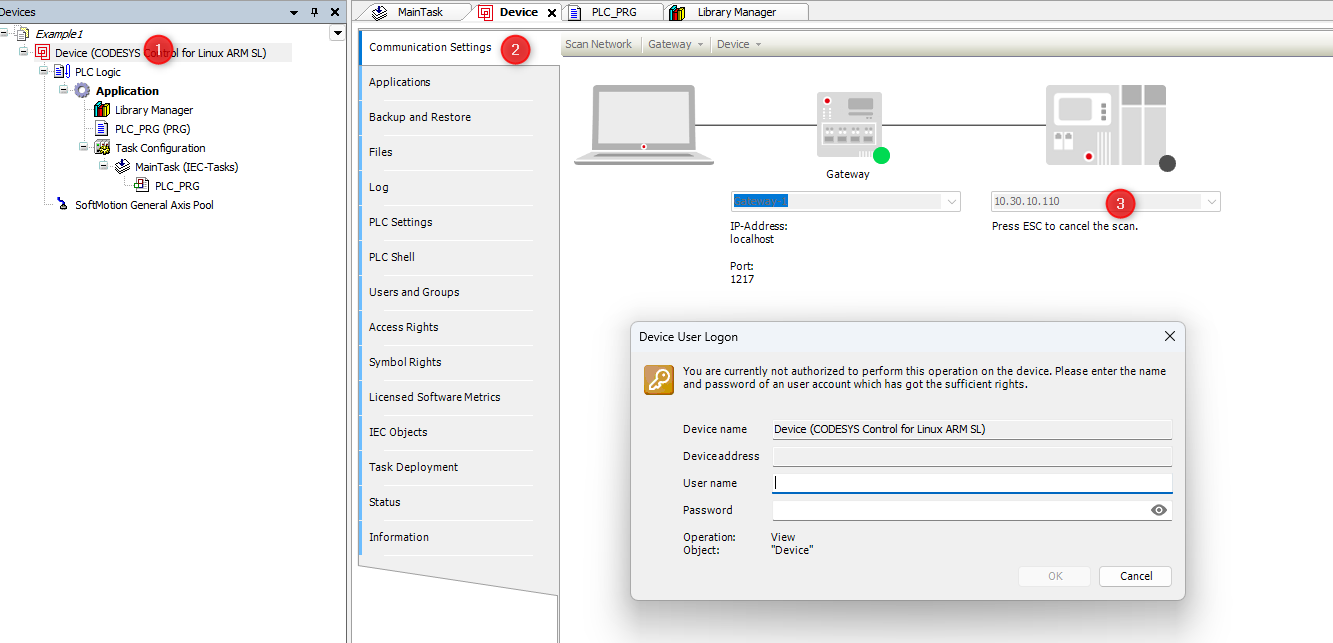 After logging in to the CANlink® mobile 10000 device, the following screen confirms that the connection between your CODESYS IDE and the device has been successfully established.

-
Download the compiled project to the device.

Figure 5: Download application -
Start the application from within CODESYS IDE.

Figure 6: Start application Check that your variables are correctly initialized. Your variables should appear similar to the following screenshot.
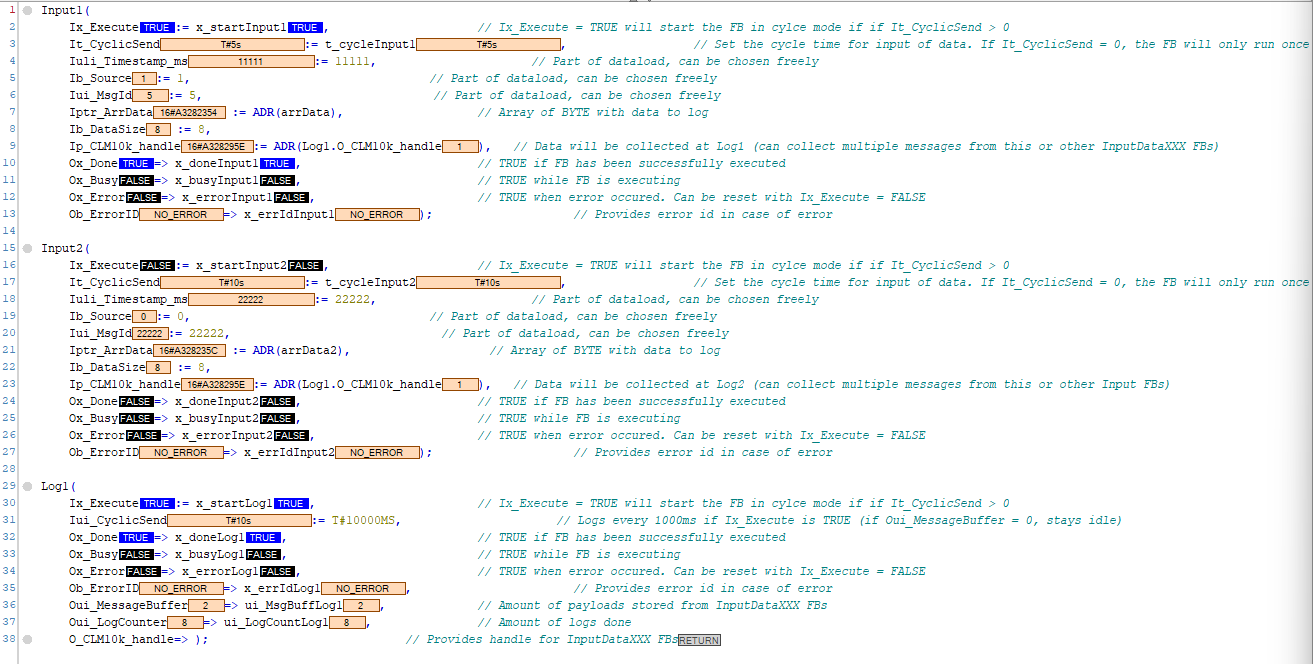
Figure 7: Example variables -
Enter the IP address of your CANlink® mobile 10000 into a web browser to access its web interface. You should access the following page.

Figure 8: Web interface CANlink® mobile 10000 -
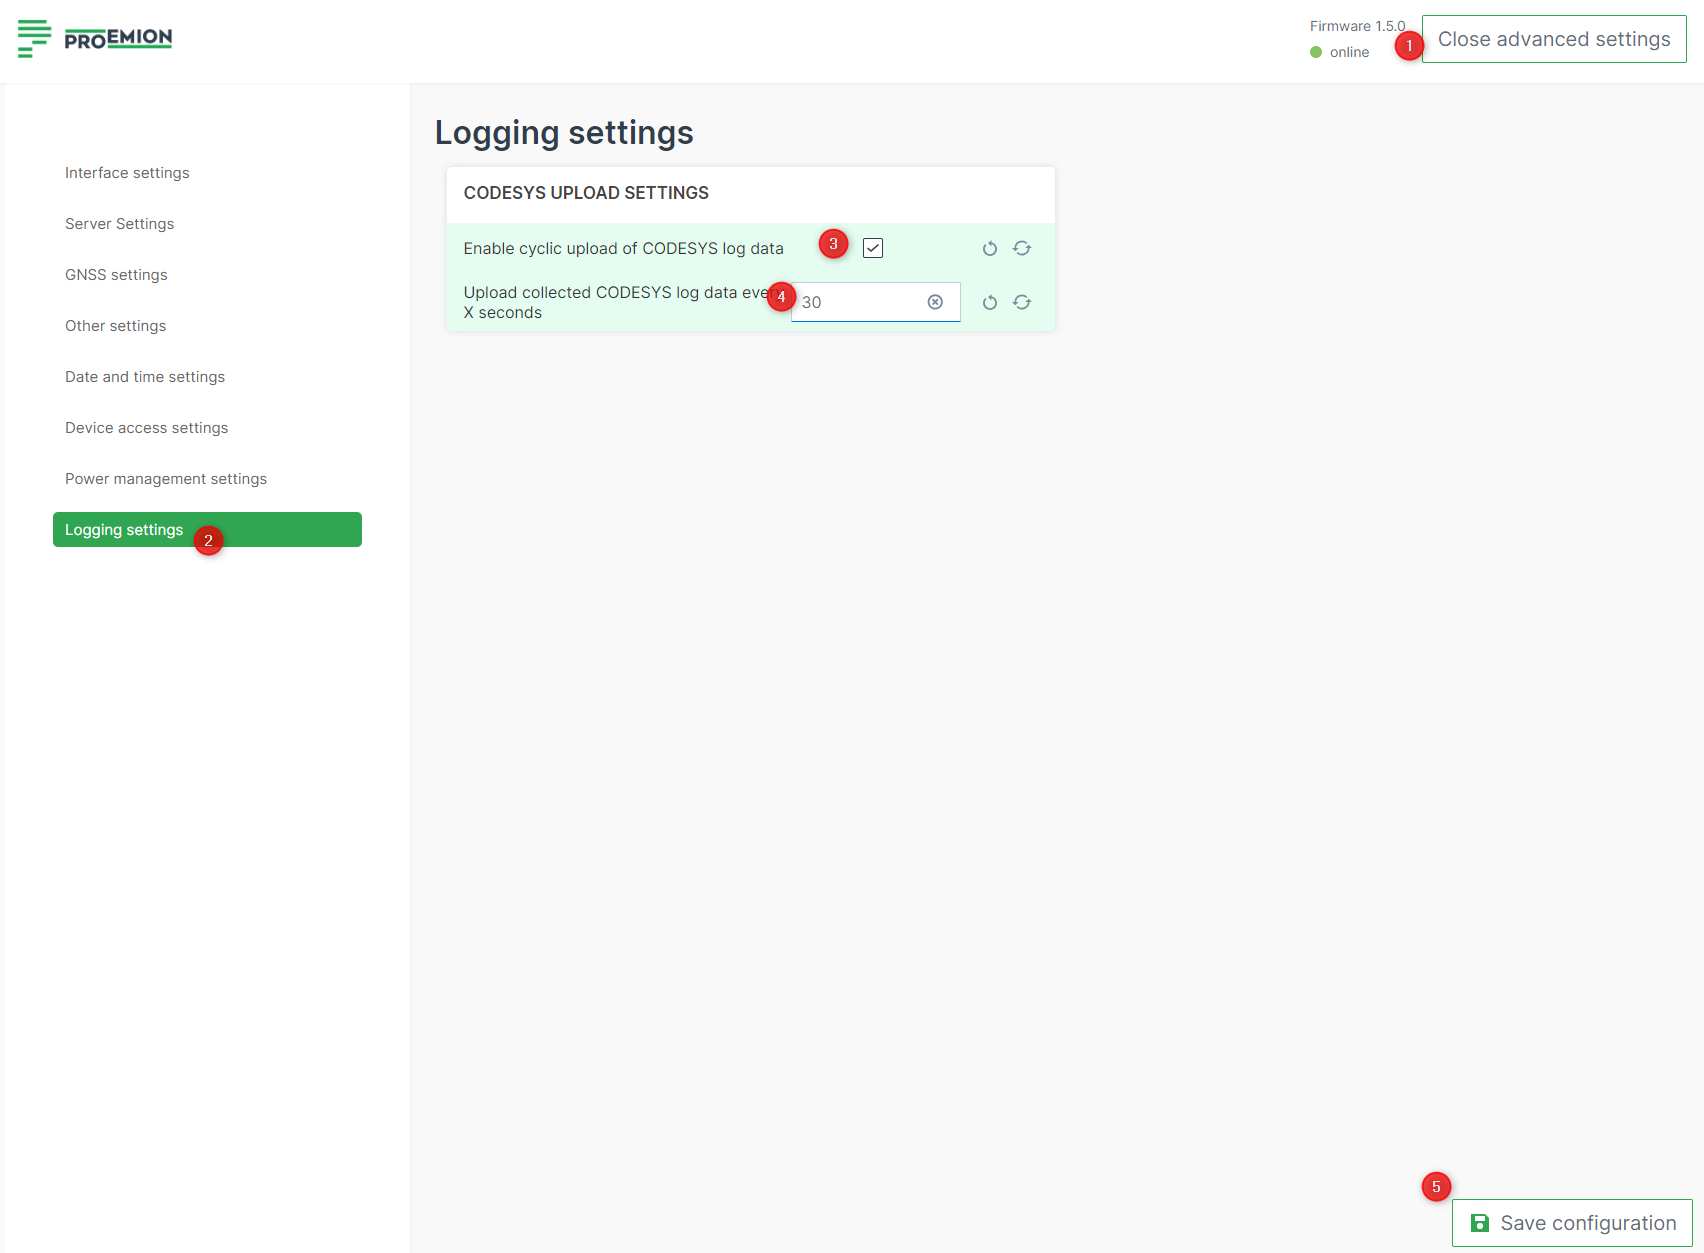
Adjust CODESYS UPLOAD SETTINGS to upload
.clffiles every 30 seconds.- 1: Navigate to Advanced Settings > Logging settings.
- 2: Open the Logging settings.
- 3: Enable cyclic upload of CODESYS log data: activate checkbox.
- 4: Upload collected CODESYS log data every X seconds: type 30.