Add and Configure Gateway Devices
Add the CAN devices via the Play buttons in Connection Control to establish a connection between them.
Configure their communication settings via Gateway Settings.
Add Gateway Device 1
-
Add the gateway device, e.g. PCAN-USB, see Resources for where to get it.
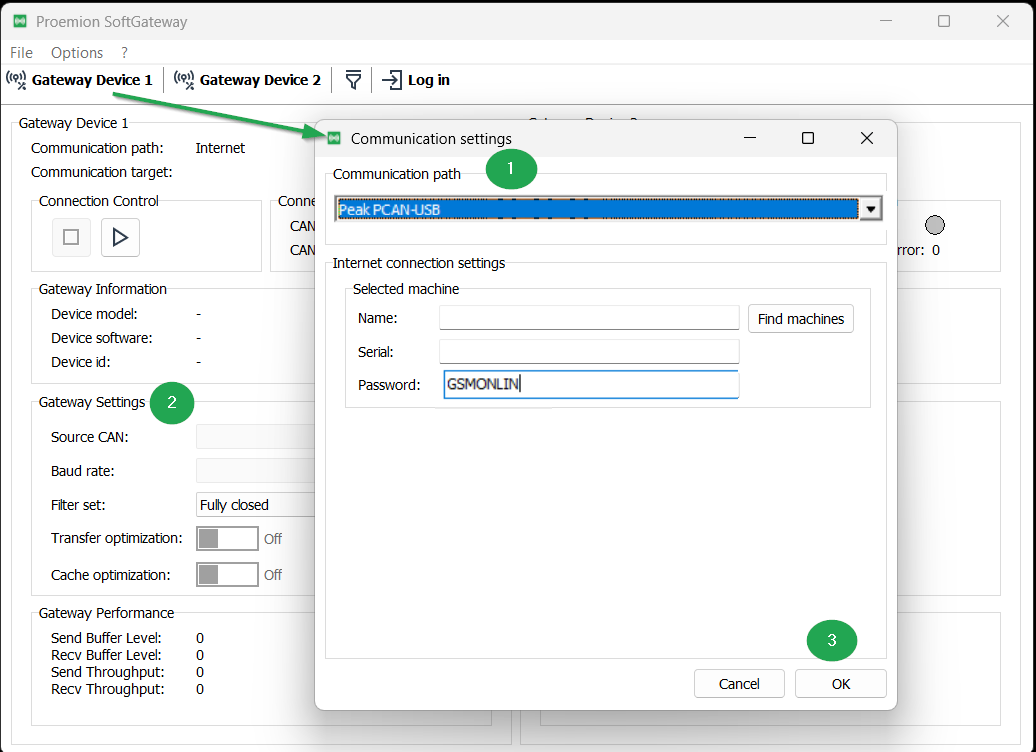
Figure 1: Gateway Device 1 configuration Enter the password
GSMONLIN. -
Adjust the settings where necessary, e.g. the Baud rate (set the CAN bit rate according to the system).
-
Click OK to apply the settings.
The final Gateway Device 1 setup looks as follows:
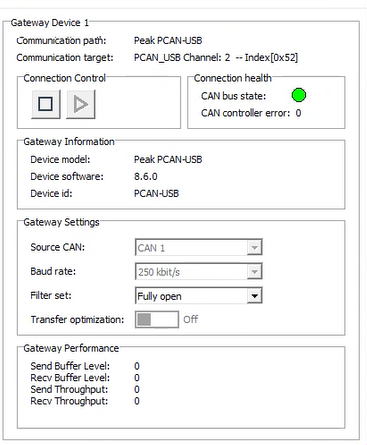
Figure 2: Gateway Device 1
Add Gateway Device 2
-
Add the CANlink mobile by logging in to DataPlatform.
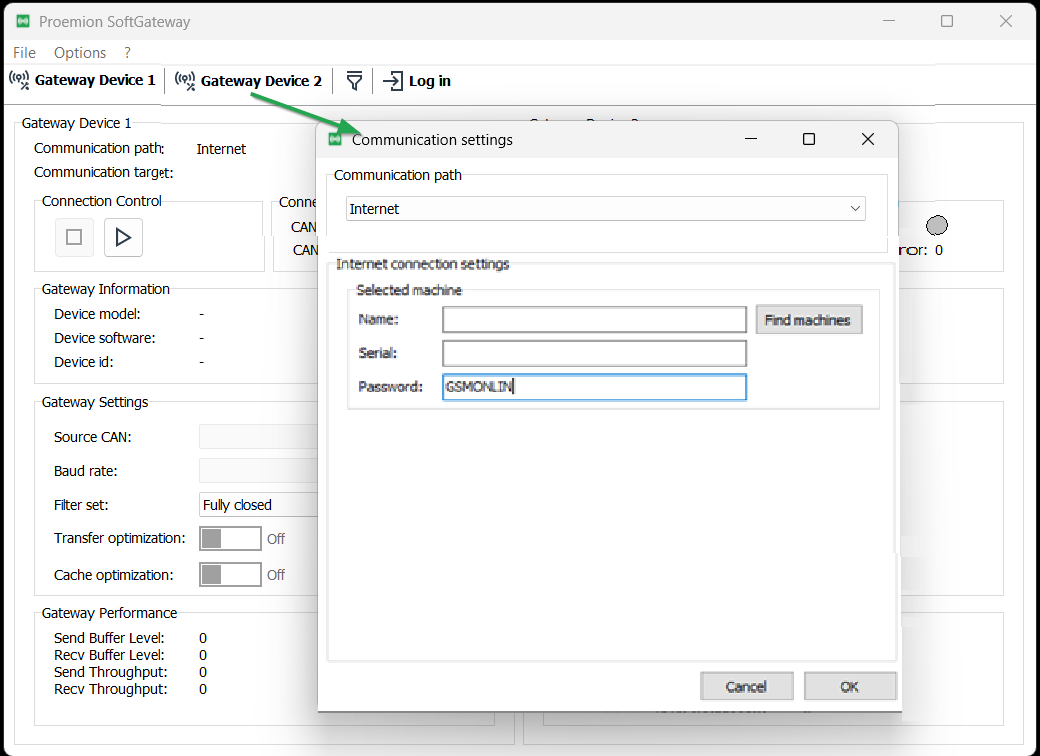
Figure 3: Gateway Device 2 configuration -
Click Find machines to select the target device or machine.
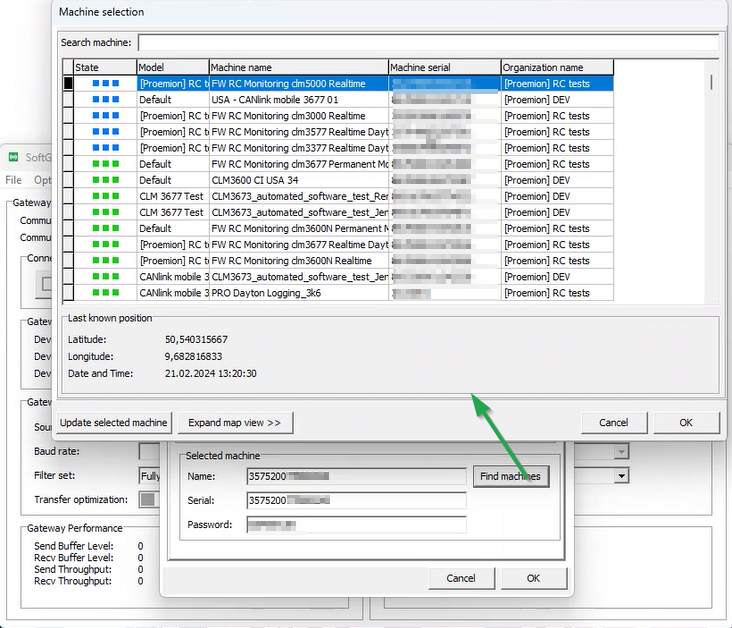
Figure 4: Find machines -
Adjust the settings where necessary, e.g. Source CAN (choose the CAN interface, e.g. CAN1 or CAN2).
Note
During an active connection, the available CAN interface can be switched. Transfer Optimization is turned on automatically in this case.
Successful Connection
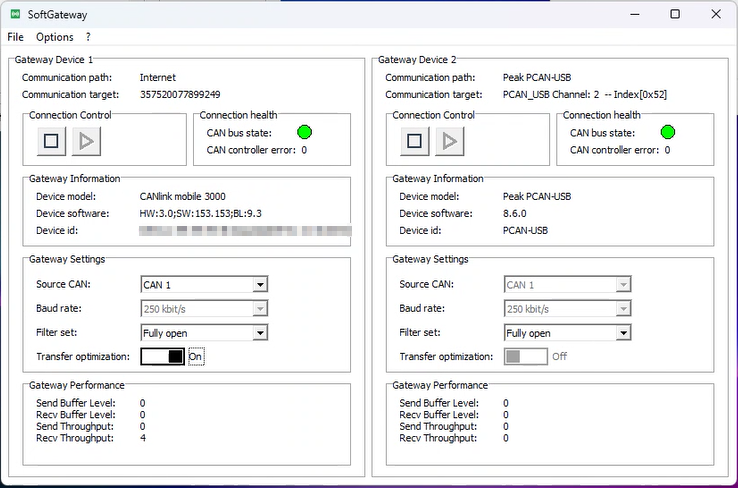
When the connection is successful, SoftGateway indicates the connected devices with a green status in Connection health:
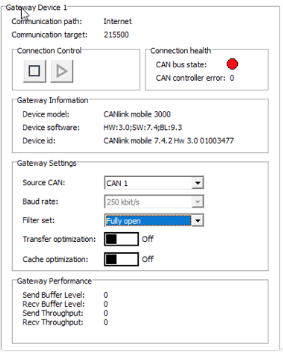
If a gateway device has a problem, the CAN bus state in Connection health turns red, indicating an error:
Stop the connection via Connection Control, or by closing SoftGateway.
The configuration is saved and proposed again at the start of the next session.